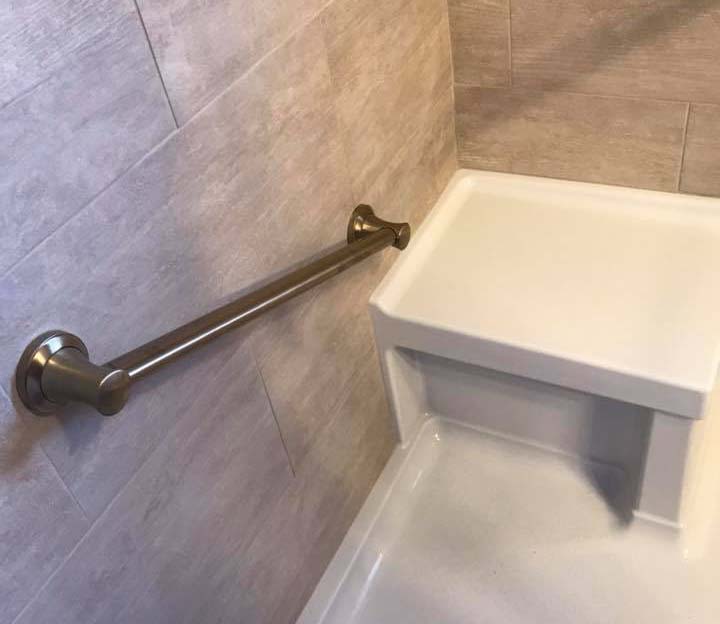
Replacing the acrylic grab bar in the shower is just like replacing other shower items you installed earlier. It takes only a few tools, a specific time, not so long, and a bit of attention. So yes, acrylic shower grab bar replacement can be a DIY project, even if you have no prior experience.
However, in simple steps, many people don’t know how to replace the acrylic grab bars in the shower. It consists of two major parts: removing the existing one and installing the replacement grab bar.
In short, you need to unscrew the current setup using a few essential tools and remove the bar. Then, you can install the replacement unit in the same position with complete care and control. The whole task may take 1-3 hours to securely attach the grab bar to the studs.
Now, I suggest you read the entire content to avoid missing any essential steps. Otherwise, you may fail to keep the bar secure and safe for grabbing.
Tools Required for Acrylic Shower Grab Bar Replacement
If you want to replace the existing acrylic shower grab bar with a new one, you will need some essential tools. Nothing to worry about as these tools are available at a nearby store, or maybe they are already at your home.
- A drill
- A screwdriver
- A hammer
- A utility knifes
- A putty knife
- A sponge
- An Allen wrench
- New grab bar
- Grab bar mounting hardware
- Shower wall anchors (if needed)
How to Remove Old/Existing Acrylic Grab Bar in the Shower
As I have already mentioned, our current project has two parts; I am presenting the first one here. First, you must remove the old grab bar from your shower. It is a challenging task, given that you might cause damage to the shower if you aren’t careful.
Hence, it is important that you work with proper caution to remove the acrylic grab bar soon. It will take 10-15 minutes.
Now, follow the below steps to remove the old, discolored, or damaged acrylic grab bar:
Step 1: Preparing the Workplace
Remove anything nearby the place of work. It will prevent getting things messed up. Also, it is good to have kept the shower dry for the replacement. By doing so, you may escape slipping while you are working with tools.
Plus, use an old rag or cloth to wrap the shower so that you don’t hurt the expensive shower. It is crucial because the tempered glass on the shower is expensive. Thus, you won’t want to hurt it while working with the inexpensive shower grab bar for a costlier replacement.
Step 2: Unscrew the Mounting Hardware
Take the drill to remove the old grab bar from the acrylic shower. Next, unscrew the mounting hardware and pull the grab bar away from the wall. At this step, there will be some dust which you can clean using a sponge.
You may wear a mask to avoid the dust entering your nostrils. Also, clean the dust with the sponge so that it doesn’t make the floor dusty and slippery.
Step 3: Remove the Anchors
If you have mounted the grab bar with wall anchors, there is something more to do. Take the hammer and putty knife to remove those anchors from the acrylic wall. First, use the putty knife to remove any glues beforehand. After that, tap the hammer on the anchors until they become loose enough to be removed.
Now, you can remove the bar and other existing screws. Keep the screws and nuts aside to use in the next steps. Also, you should clean them with rust cleaner to eliminate rust and residues. It helps you from investing additionally in new screws.
Things You Should Know about Acrylic Shower Grab Bar Removal
Removing a grab bar from the acrylic shower is easier than its installation. After all, it does not require any measurements.
Sometimes, you may not see any screws holding the bar to the wall. But don’t worry! There will be a round steel plate against the wall at both ends of the bar. This plate is known as an escutcheon to hide all the screws and increase the beauty of the shower.
If your shower has an escutcheon, you can cut the caulk using a utility knife. Then, you can pry the thing using a flat-head screwdriver and lever the plate easily. Remove any set screws before prying the plate. An Allen wrench can help you in this case.
After removing the escutcheon, remove all the screws using the drill or screwdriver. As a result, the existing acrylic shower grab bar will fall from the mounting area. That’s all!
How to Install New/Replacement Acrylic Grab Bar in the Shower
The next part of replacing the acrylic grab bar in the shower is installing a new unit to the removed area of the old one. But, again, you don’t need any new tools for installation, as I have already mentioned in the previous segment of the article.
Now, stay with me and follow the processes:
Step 1: Clean the Space
After removing the old grab bar, clean the area where the grab bar will be mounted. It helps to prevent the new bar from clogging in the tiniest holes or edges. You may use detergent or WD-40 commercial cleaner to wash the grab bar surface.
This cleaning is essential because the new grab bar in your shower may not be installed properly without it. Clogs in the holes will prevent the proper installation. So, ensure you reach every spot to clean it accurately.
Step 2: Patching the Holes (applicable only for wall anchors)
If the previous grab bar was mounted with wall anchors, you might patch the holes with a spackle or joint compound. Skip this step if you haven’t used wall anchors.
Step 2: Mount the New Grab Bar
Now, you are ready to install the new grab bar. I hope you have the acrylic grab bar with new wall anchors. You can get the grab bar from a hardware or plumbing store. For reference, you may take the old grab bar to the store. It helps you get the right bar and size precisely.
Then, you should screw those anchors into the wall where you want to mount the bar. Tighten the screws on both sides and check the grab bar firmly. You need to tighten the screws slightly if it tends to come out.
Step 4: Process for Grab Bars Without Anchor Walls
For a new grab bar without new wall anchors, you can use the existing anchors again; if the existing anchors are dead or not in good condition, order and install new sets from the nearby hardware store.
Step 5: Tightening the Hardware
After placing the wall anchors, screw the mounting hardware for the grab bar into the anchors. Then, tighten the hardware until the grab bar is secure. You need to check the tightness of the grab bar multiple times to finish off the screwing process accurately. If you over-tighten the hardware, it will get damaged and need replacement.
Step 6: Check the Strength of the Grab Bar
Try to pull the bar and check if things are well now. If the grab bar is not secured tightly, try to tighten the screws properly. That’s it! You’ve successfully replaced your old grab bar with a new one.
Things You Should Know about Acrylic Shower Grab Bar Installation
I hope now you know about the removal and installation of the replacement acrylic grab bar in the shower. A question may come to your mind. In fact, many people ask if they should install the bar horizontally or vertically. Here is a proper explanation:
If you want to install the grab bar in the shower or tub areas, then place it vertically. It may help in opening and closing the door. Also, it can prevent you from stepping in and out of the shower by mistake.
You can install the bar horizontally if you need to move more frequently. It is helpful for people who want to use the grab bar to support standing or sitting down. Especially these installations are near the toilet, where you need an extra hand.
Frequently Asked Questions
Can a grab bar be installed in a fiberglass shower?
Answer: You can install the fiberglass shower with the grab bar. It will work fine with fiberglass because of its reinforced design.
How high should grab bars be installed in a shower?
Answer: The grab bars should be 33 inches to 36 inches above your shower floor. It helps you reach the grab bar without much stress. However, if you put it too high, many people may not reach it.
What are the different types of grab bars?
Answer: There’re many types of grab bars for showers. It includes wall-mounted, bathtub-mounted, folding, suction, free-standing, etc. Depending on your shower space and design, you can choose any of these grab bars.
Should shower grab bars be horizontal or vertical?
Answer: The shower grab bar installation must be vertical. However, if you place the grab bar in other spaces, you can install it horizontally too.
Should grab bars be angled?
Answer: For grab bars of 24-inches or above, you can mount them at a 45-degree angle. If it is less than 24 inches, you should mount it flat.
Conclusion
So, I am at the end of the discussion of how to replace the acrylic grab bar in the shower. After all, replacing an acrylic grab bar in your shower is not difficult. Furthermore, you can complete this DIY project in a short amount of time with just a few tools. Lastly, I suggest you read the instructions carefully and follow all the steps to ensure a successful installation.
Paul Newman is a blogger who writes about plumbing and home improvement. Over the past 20 years, I have worked as a plumber. My passion is to share my knowledge and experience with others to improve their homes.


