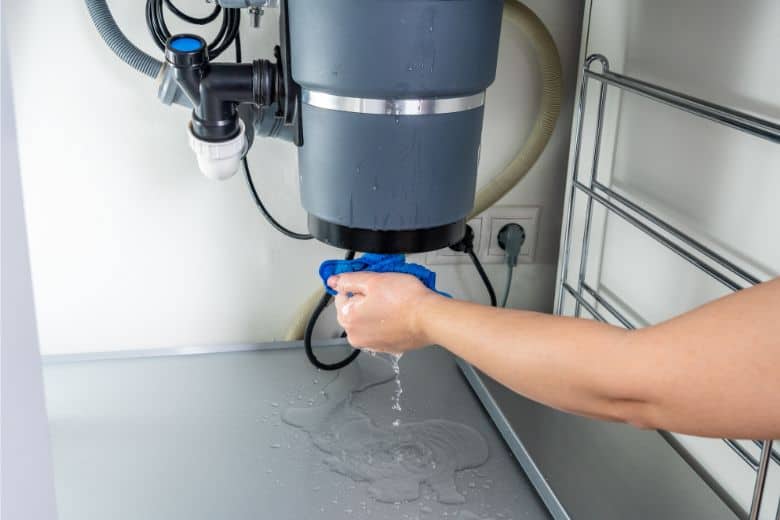
Garbage disposals are handy appliances that help keep our kitchens clean and odor-free. But when garbage disposal leaking from bottom, suddenly it becomes less valuable and questionable.
But do you know why this happens and how to deal with it?
However, the reasons behind the garbage disposal leaking are often straightforward. It could be used to wear and tear, loose connections, or internal seal damage.
Eventually, you must identify the genuine reason, and then you can be approached for a solution. With that said, our following guide breaks down each potential cause. Henceforth, it offers step-by-step solutions to help you tackle the problem head-on and effectively.
Now look forward to detailed guidelines.
Why Is My Garbage Disposal Leaking from the Bottom?
As mentioned, understanding the leak’s source is the first step toward finding a solution. So without further talk, let’s see the possible reason for this leaking issue.
1. Seal Failure:
A failed seal is the most common cause of garbage disposal leaking from the bottom. Sometimes the seals inside the disposal that prevent water from leaking out can deteriorate or become damaged, as it causes water to seep out and create a leak.
2. Internal Component Breakdown:
Another reason is the breakdown of internal components. It could be the impellers, grinding, or shredder rings. While external fittings are usually the culprits they fail or crack, water can start to leak from the bottom.
3. Loose Plumbing Connections:
Sometimes the connections to the drain or dishwasher become loose. These can lead water to leak out of these connections and appear to be coming from the bottom of the disposal.
4. Cracked Housing:
Although less common, the garbage disposal housing itself could crack, especially if it’s made of a material like plastic. It would cause a leak from the bottom.
5. Incorrect Installation:
It is less common because professionals usually install garbage disposals. If an inexperienced person attempts the installation, they might not tighten all connections properly or misalign some components, leading to leaks.
6. Excessive Vibration:
Sometimes garbage disposals can vibrate excessively if not balanced correctly or if something rigid (like a bone or metal utensil) gets into the disposal. These vibrations can lead to structural damage and eventually cause leaks.
7. Overuse or Overload:
While it’s less common, overuse or overload of a garbage disposal can also cause it to wear out prematurely, leading to possible leaks. It is especially true if you frequently grind up hard or fibrous materials the disposal is not designed to handle.
8. Age Matters
Like any other household appliance, a garbage disposal unit has a lifespan. It may start leaking with time simply because it’s old and worn out.
Understanding Your Garbage Disposal Unit
Now you know the possible reason behind the leaking. Before you go ahead to fix the issue, you must learn what a garbage disposal unit is and how it works. Have a look!
- Components of a Garbage Disposal Unit: A typical garbage disposal unit consists of a motor, grind ring, impellers, flywheel, sink flange, and a waste pipe. Together, these parts work in unison to grind up food waste and expel it safely into your home’s wastewater system.
- How the Garbage Disposal Works: The garbage disposal operates by spinning the impellers at high speeds against the grind ring, breaking down the food waste into tiny particles. The particles are then flushed down the waste pipe with running water.
What’s Next? Diagnosing Your Leaking Garbage Disposal
After you’ve got the lay of the land, it’s time to roll up your sleeves and figure out what’s going on.
- Visual Inspection: Start by conducting a thorough visual inspection of your garbage disposal unit. Look for apparent damage or loose fittings that could be causing the leak.
- The Water Test: Conduct a water test if visual inspection doesn’t reveal much. Fill your sink with water, then release it all at once. It will help pinpoint the location of the leak.
The Hands-On Approach: Fixing Your Leaking Garbage Disposal
So, you’ve found the source of your leak. The good news is most leaks can be fixed with some elbow grease and a bit of DIY spirit. Here are some fixes you can try.
Step 1: Switch off the Power Supply
Before starting, switch off the power supply to your garbage disposal unit. You must follow this step to avoid electrical hazards and accidents.
Step 2: Tightening Loose Fittings
If your garbage disposal leak is due to loose fittings, it might be as simple as tightening them. Clean up any water and dry the areas around the disposal unit. Identify where the leak is coming from. It can be the sink flange, dishwasher hose, or drainpipe connection.
Unplug the garbage disposal unit from the power outlet for safety and start tightening.
Tightening the Sink Flange:
The sink flange is where the garbage disposal unit connects to the sink. If it’s leaking, you should tighten it.
- Look under your sink and find where the garbage disposal connects.
- There should be a ring you can tighten by hand or with a wrench. Ensure you hold the bottom of the flange from inside the sink while doing this to keep it from moving around.
- If this doesn’t stop the leak, you may need to replace the plumber’s putty. Remove the garbage disposal unit, apply new putty, and reinstall the unit.
Tightening the Dishwasher Hose:
If it’s loose, it can also cause a leak then follow this step.
- Locate the hose and check the metal clamp that secures it.
- Tighten this clamp with a screwdriver.
Tightening the Drainpipe Connection:
At the side of the garbage disposal, a pipe sends the ground-up food particles out to your home’s main drain. If this connection is loose, it can leak.
- There should be two screws holding the pipe to the garbage disposal.
- Tighten these screws with a screwdriver. Be careful not to overtighten, as this can crack the plastic fitting.
Step 3: Replacing a Worn-Out Garbage Disposal Unit
If the leak happens for a worn-out garbage disposal unit, then you can follow the below step to solve the issue.
- Turn off the electrical power at the circuit breaker or fuse box for safety.
- Disconnect the drainpipe and dishwasher hose from the old garbage disposal under the sink.
- Turn the mounting ring counterclockwise to remove the old disposal unit.
- Unscrew the mounting ring on the sink flange, then push the sink flange up through the sink hole.
- Clean off any old plumber’s putty around the sink hole.
- Apply the new plumber’s putty around the edge of the new sink flange, then place it into the sink hole.
- From under the sink, attach the new mounting ring to the sink flange. Tighten until secure and remove excess putty.
- Place the new garbage disposal into the mounting ring, turning it clockwise until it locks into place.
- Reconnect the drainpipe and dishwasher hose to the new garbage disposal, ensuring all connections are tight.
- Restore power at the circuit breaker.
- Run the water and turn on the disposal to check for leaks. If you notice any, tighten the connections or add more plumber’s putty as needed.
Step 4: Repairing Damaged Seals
When the seals inside the unit are damaged, causing leaks from the bottom, it’s typically more cost-effective and safer to replace the whole unit rather than trying to repair it.
Let’s learn how to apply it.
- Unplug the garbage disposal unit from the electrical outlet for safety.
- Go under the sink, disconnect the drainpipe and the dishwasher hose (if applicable) from the garbage disposal. Turn the mounting ring counterclockwise to remove the disposal unit from the sink.
- Push the sink flange up through the sink hole from underneath.
- Remove all the old plumber’s putty from around the sinkhole and the flange.
- Roll a generous amount of plumber’s putty into a rope shape. The rope should be long enough to circle the sink flange. Apply this around the bottom edge of the sink flange.
- With the new putty applied, press the sink flange back down into the sink hole.
- From under the sink, reattach the garbage disposal to the sink flange. Ensure that it locks securely in place.
- Reconnect the drainpipe and the dishwasher hose (if applicable) to the garbage disposal.
- If any putty has oozed out during reinstallation, wipe this away with a damp cloth.
- Plug the garbage disposal back into the power outlet. Run water through the sink and turn on the garbage disposal to check for leaks. If any leaks are found, additional plumber’s putty may be needed, or the connections may need to be tightened.
Note: Plumber’s putty is a sealant used in plumbing applications. It’s pliable, easy to mold, and provides a waterproof seal, making it ideal for sealing the area between the sink and the garbage disposal flange.
Necessary Precautions for Garbage Disposal Repair and Replacement
- Always disconnect the power before starting.
- Have the right tools ready.
- Handle with care because garbage disposals are heavy and have sharp blades.
- Look for wear or damage before starting work.
- Apply the plumber’s putty correctly and ensure a complete seal around the sink flange.
- Run water through the disposal unit after the job to check leaks.
Frequently Asked Questions
How much does it cost to replace a garbage disposal?
Answer: The cost can vary depending on the model and labor charges, but generally, it can range from $150 to $400.
Is leaking garbage disposal a safety hazard?
Answer: It can be, especially if the water meets the electrical components. Always unplug the disposal or turn off the power at the circuit breaker before beginning any repairs.
Can a leaking garbage disposal cause other problems?
Answer: Yes, if not addressed, it can lead to water damage, mold growth, and electrical issues.
Do garbage disposal units need to be replaced over time?
Answer: Like other household appliances, a garbage disposal unit has a lifespan. If yours is old and constantly causing problems, it might be time for a replacement.
Conclusion
Lastly, watch out for signs like strange noises, foul odors, or slow draining, which could indicate a potential issue.
However, that’s a wrap on everything you need to know about garbage disposal leaking from the bottom.
With knowledge in your toolbox, you can effectively tackle this common household issue. Best of luck!
Paul Newman is a blogger who writes about plumbing and home improvement. Over the past 20 years, I have worked as a plumber. My passion is to share my knowledge and experience with others to improve their homes.


