Are you clueless about the solution to fill gap between stove and countertop?
If yes, then you have come to the right place. Since in this article, we have elaborately described how to close the gap between the stove and countertop.
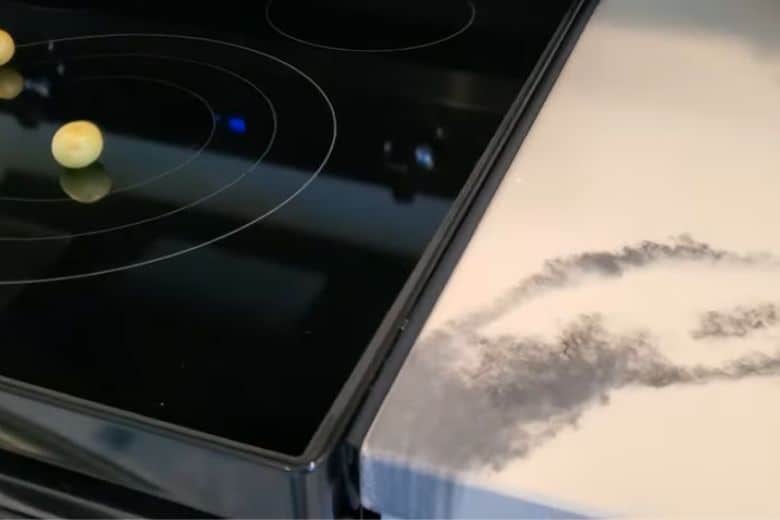
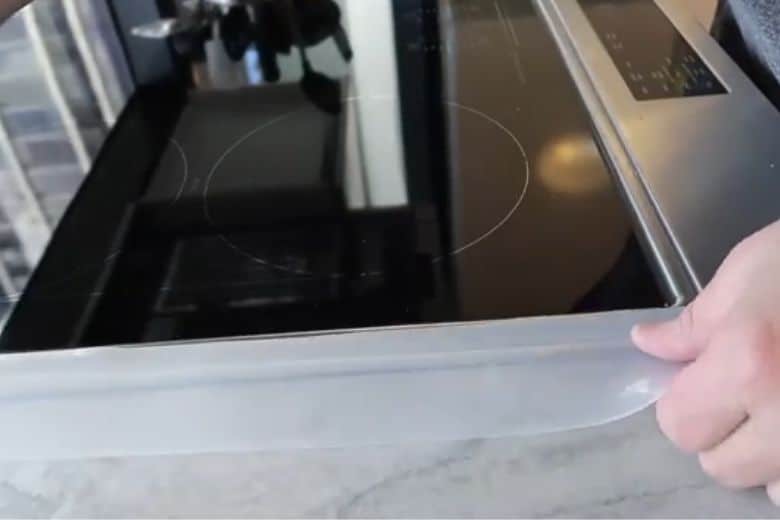
Generally, the gap between the stove and countertop is a common problem in many kitchens. You may have noticed a gap between the two when you have cooked on a stove that needs to be flush with the countertop. This small space can quickly accumulate debris and make potential safety hazards if not taken seriously.
However, we will discuss different solutions available to fill the gap today. Therefore also, explain why taking action to close the gap is essential.
Keep reading.
Why Is It Dangerous to Have Gap Between Stove and Countertop?
While the gap between stove and countertop may seem like a trivial issue, it can significantly impact your kitchen and overall well-being. Some of the most significant dangers include:
- The gap between the stove and countertop can lead to several potential problems, including hygiene concerns, safety hazards, and reduced efficiency in the kitchen.
- The gap regularly accumulates food debris, grease, and crumbs, leading to hygiene issues and potentially attracting pests into the kitchen.
- It can create a potential safety hazard, leading to burns or fire if food or grease falls into it. Additionally, sharp objects or utensils can easily slip into the gap, causing injury.
- The gap can also impact the functionality of the kitchen. For example, any ingredients can fall into the hole, making it difficult to retrieve them. Consequently, it will lead you to frustration and wasted time in the kitchen.
- Examples of how the gap can be a nuisance in everyday life include difficulty cleaning the kitchen, unpleasant smells, and the loss of small objects or utensils.
- It’s worth taking action to close the gap in your kitchen to prevent potential safety hazards and hygiene concerns. By doing so, you’ll create a safer and cleaner environment, as well as a more functional kitchen.
The Solution to Fill the Gap Between Stove and Countertop (6 Distinctive Ways)
The dimensions of the gap between the stove and countertop depend on the stove and countertop’s size and model. It can range from a few millimeters to a few centimeters and can be located at the back or sides of the stove.
Like to the sink and countertop gap, you can apply multiple solutions to fill the gap between stove and countertop. Several solutions are available to fill the gap, and we have included all of them.
Have a look one by one.
System 1: Silicone Solution
The silicone strip is the first and most affordable DIY method to fill the gap between countertop and stove. It is inexpensive, avail in multiple colors, and you can buy it spontaneously. To use it, follow these steps:
- Purchase a silicone sealant that is safe for use in high-temperature environments.
- Clean the gap thoroughly to ensure it is free from debris and grease.
- Apply a generous bead of silicone along the gap, smoothing it out with a caulking tool or your finger.
- Allow the silicone to dry for at least 24 hours before using the stove.
Advantage:
Silicone is durable and heat-resistant, making it a long-lasting solution. It’s also relatively affordable.
Disadvantage:
The silicone can be challenging to remove if you need to clean or replace it, and it may not provide a seamless finish.
Note to Remember: Use a small amount of rubbing alcohol to remove excess silicone and achieve a professional-looking finish.
System 2: Use Foam to Fill the Gap

A foam backer rod is a material that doesn’t absorb liquid and can be compressed. You can cut it into customized sizes as per your need. To use this product to fill the gap, follow these steps:
- Purchase a foam backer rod that is the same width as the gap.
- Insert the foam backer rod into the gap, pushing it down until it is level with the countertop.
- Apply a sealant or caulk over the foam to fill any remaining gaps.
- Allow the sealant to dry for at least 24 hours before using the stove.
Advantage:
Foam is affordable and easy to install.
Disadvantage:
The foam may not be as durable as silicone and can compress over time, leading to gaps.
Note to Remember: Use a sharp utility knife to cut the foam backer rod to the correct length and achieve a neat finish.
System 3: Magnetic Strip

Another suitable and convenient method to solve the gap problem is using a magnetic strip. It is straightforward to apply and takes little time.
- Purchase magnetic strips that are designed for use in kitchens.
- Cut the strips to the correct length and attach them to the edge of the stove and the countertop.
- Ensure the magnets are aligned correctly and strong enough to hold the strips.
Advantage:
The magnetic solution is removable and provides a seamless finish.
Disadvantage:
It may not be as durable as other solutions, and the magnets may lose strength over time.
Note to Remember: Measure the gap carefully to ensure you purchase the correct length of a magnetic strip.
System 4: Seal Tape
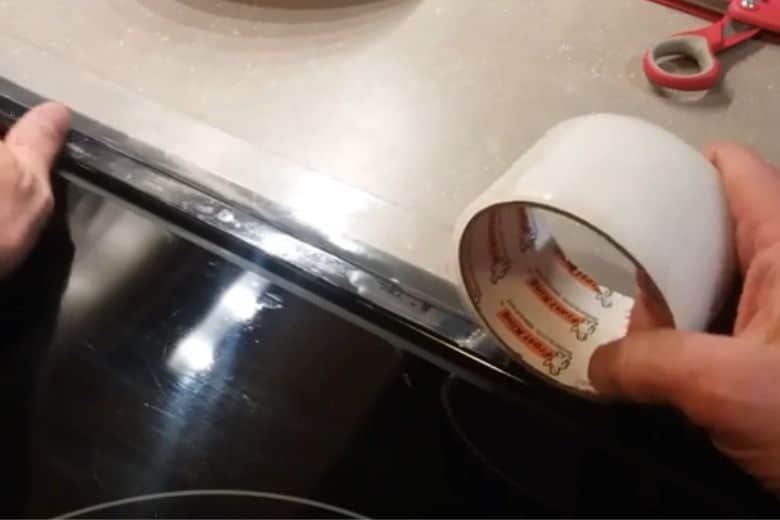
It is actually a temporary solution and very painless to apply when looking for a quick fix. Seal tape is flexible and self-adhesive tape is handy in this matter. Here are the steps to use seal tape to fill the gap:
- Before applying the seal tape, ensure the gap is clean and dry. Use a cloth or sponge to remove dirt, debris, or grease.
- Measure the gap length and cut a piece of seal tape to the correct size. Add a few extra inches to the length to ensure a proper seal.
- Peel off the backing of the seal tape and carefully apply it to the gap, pressing down firmly to ensure a good seal. Use a roller or finger to smooth out wrinkles or air bubbles.
- Use scissors or a utility knife to trim off any excess tape. Be sure to cut the tape flush with the edge of the stove and countertop.
Advantage:
Seal tape is an affordable, easy-to-use solution for filling the gap between the stove and countertop. It is also removable and leaves no residue behind.
Disadvantage:
Seal tape may not be as durable as other solutions. But it may require frequent replacement if it becomes worn or dirty.
Note to Remember: Choose a heat-resistant seal tape that is safe for use in the kitchen. Apply it carefully to ensure a good seal, and trim any excess to achieve a neat finish.
System 5: Plastic Tubing
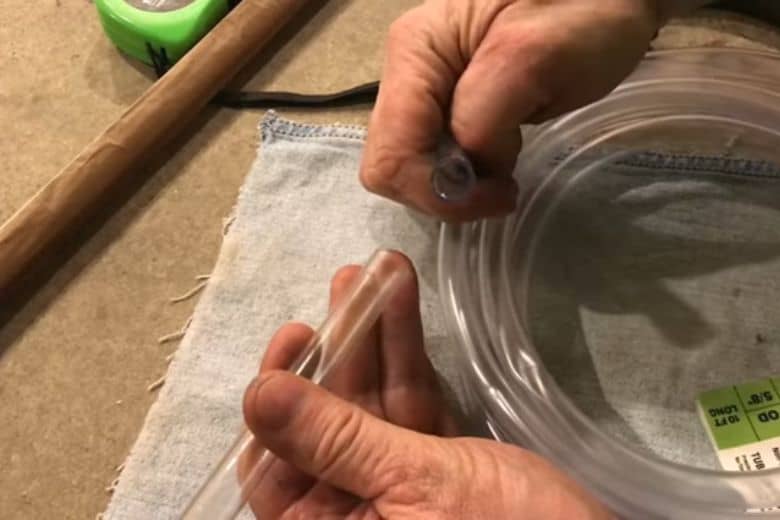
Plastic tubing is again a DIY solution for filling the gap between the stove and countertop. This solution involves using flexible plastic tubing to create a seal and prevent debris from accumulating in the hole.
- Make sure the gap between the stove and countertop is clean and dry.
- First, measure the gap size and cut a piece of flexible plastic tubing to the same length. Make sure the diameter of the tubing is slightly larger than the gap.
- Carefully insert the tubing into the gap, and be careful it fits snugly. Use a flat tool to push the tubing further into the gap if necessary.
- Use scissors or a utility knife to trim off any excess tubing so that it is flush with the edge of the stove and countertop.
Advantage:
Plastic tubing is an affordable and easy-to-find material that effectively fills the gap between the stove and countertop. It is also durable and can last for a long time.
Disadvantage:
The tubing may not create a completely airtight seal and may be difficult to clean if debris gets inside. Additionally, it may not look as neat as other solutions.
Note to Remember: Use a tube that is heat-resistant and food-safe. However, insert the tubing carefully to ensure a snug fit, and clean excess tubing to get a neat finish. While it may not look as professional as other options, it can effectively prevent debris from accumulating in the gap and improve the hygiene and safety of your kitchen.
System 6: Use Premade Gap Cover
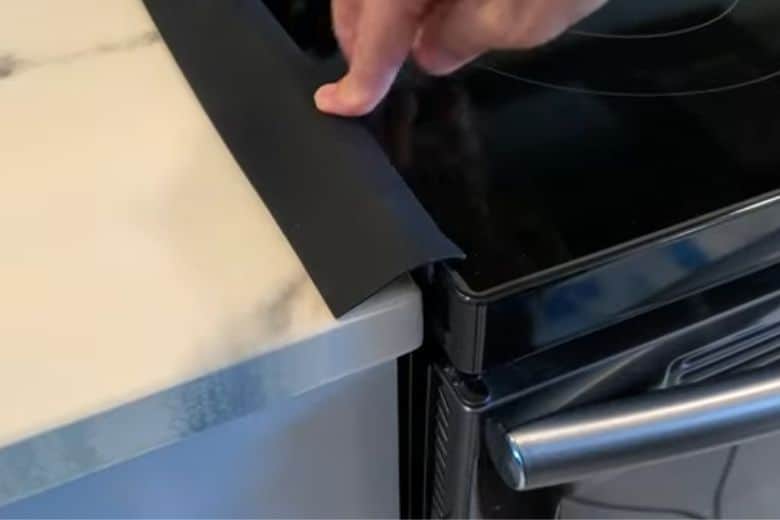
Premade gap cover is known as a stove cap cover. Depending on the stove and countertop size, it is available in different sizes to fit the gap. The cap cover is specially designed to fill the gap between a stove and a countertop. It is a heat-resistant material that is simple to install and clean.
- Measure the width and depth of the gap to ensure proper fit
- Choose the appropriate size and color of the gap cover
- Place the gap cover over the gap and adjust as necessary
- For added security, some gap covers come with adhesive strips to hold them in place
Advantage:
You do not need any tools or DIY skills for this method. Therefore, it comes in various colors that match different kitchen styles. In fact, you can easily remove it for cleaning.
Disadvantage:
It may only fit perfectly in some size gaps due to its limited range of sizes.
Note to Remember: Look for gap covers with a textured surface to prevent slipping or sliding. Moreover, clean the gap cover regularly to avoid the buildup of debris or grime. Lastly, choose a gap cover made from a heat-resistant material to prevent melting or warping.
System 7: Use Wood Board
Wood boards are another potential DIY method for filling the gap between the stove and countertop. This method involves cutting and fitting a wooden board into the gap to create a seal. Here are the steps:
- Firstly, measure the gap’s length, width, and depth to identify the wood board size needed.
- Next, use a saw to cut a piece of wood board to the appropriate size. And be aware it fits snugly in the gap.
- After that, sand the edges and surface of the board to ensure a smooth finish.
- Apply a food-grade sealant to the board to protect it from moisture and make it easier to clean.
- Lastly, place the board into the gap and ensure that it fits nicely. You can use a plane instrument to push the board further into the hole if needed.
Advantage:
Wood boards can create a tight seal between the stove and the countertop. They can provide a more professional-looking finish than other DIY solutions. They are also durable and can last for a long time.
Disadvantage:
Wood boards may not be heat-resistant and can be a fire hazard if they come into contact with the stove. Additionally, they may be more challenging to clean than other solutions.
Note to Remember: Use a hardwood board that is thick enough to fit in the gap and withstand the heat from the stove. Remember to apply a food-grade sealant to protect the board from moisture.
Frequently Asked Questions
What is the standard gap size between the stove and countertop?
Answer: Typically, the ideal distance between the stove and countertop is 1/8 to 1/4 inch. It is advisable to consult the manufacturer’s instructions to determine your stove’s recommended gap size.
Can I use any type of silicone or foam to fill the gap?
Answer: You can only use silicone or foam designed for high-temperature and kitchen use. Carefully read the product label and instructions to ensure the material is safe for your stove and countertop.
Can I use a gap cover with a gas stove?
Answer: You should avoid using a gap cover with a gas stove since it could affect the ventilation and be dangerous. If you want to use it better, follow the manufacturer’s instructions to see what’s best for your stove.
Will filling the gap impact the functionality of my stove or countertop?
Answer: Filling the gap should not significantly impact the functionality of your stove or countertop if done properly. Besides, use materials that allow for natural movement and expansion of the stove.
How often do I need to clean the gap?
Answer: You should clean the gap regularly, especially after cooking, to prevent debris buildup and maintain hygiene. The frequency of cleaning may vary depending on how frequently you use your stove and how much debris accumulates in the gap.
Conclusion
The gap between the stove and countertop may seem like a small issue. But you must pay attention to it and take immediate action to fill the gap between stove and countertop. Doing so can improve your kitchen’s hygiene, safety, and functionality and ultimately enhance your cooking and dining experience.
Paul Newman is a blogger who writes about plumbing and home improvement. Over the past 20 years, I have worked as a plumber. My passion is to share my knowledge and experience with others to improve their homes.