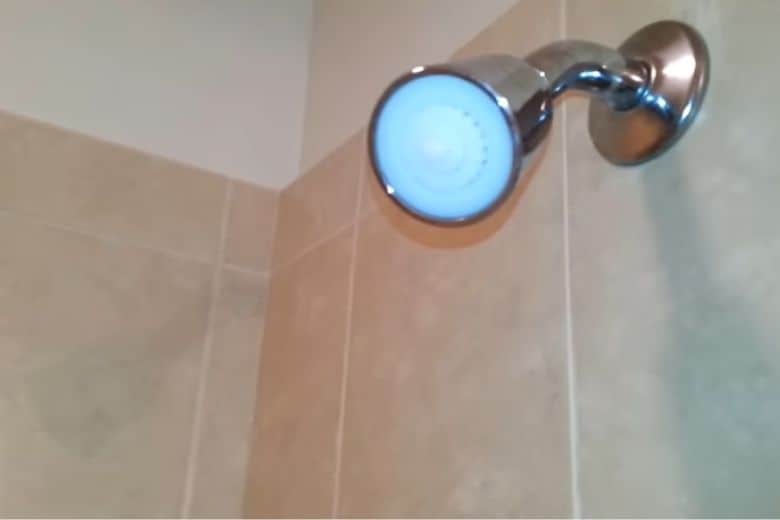
Installing a water flow restrictor in your shower head is a simple and effective way to reduce water consumption in your household.
Besides, help you save money on your water bill by reducing the water you use during your daily showers.
Since it is a device designed to limit the amount of water produced through your shower head by slowing down the water flow. Although it limits the flow rate of water, it maintains adequate pressure, allowing you to enjoy a satisfying shower.
However, most showerheads come with a pre-installed flow restrictor. But you can also purchase and install one separately if your showerhead doesn’t have one. In that case, you must know how to install water flow restrictor in shower head.
Benefits of Installing a Water Flow Restrictor in Your Shower Head:
- The primary benefit of installing a water flow restrictor is that it saves a significant amount of water daily.
- Saves energy bills by lessening the use of hot water.
- Reducing water usage and energy consumption will significantly reduce your carbon footprint and overall environmental impact.
How to Install Water Flow Restrictor in Shower Head (Step by Step Process)
Before installing water flow restrictions in your shower head, you must arrange a few tools. See the list of materials and tools you must gather before starting the installation process.
Materials:
- Water flow restrictor kit (can be purchased online or at a hardware store)
- Teflon tape
Tools:
- Adjustable wrench
- Pliers
- Screwdriver
- Towel
Step 1:
Begin by turning off the water supply to your shower. The water valve for a shower head is usually located behind the shower wall or within the shower plumbing system. But if you are unsure where the valve is located, you can turn off the main water valve for your house or apartment.
Turn the valve clockwise to shut off the water supply.
Step 2:
In the next step, remove the shower head from the wall or shower arm. Here, you have to use an adjustable wrench or piler to lose the screw of the shower head. Carefully remove all screws and be careful not to damage threads: shower arm or wall.
Step 3:
After successfully removing the shower head, you must inspect for any pre-existing water flow restrictors. Some shower heads already have flow restrictors built-in, and removing them can damage the shower head or cause it to malfunction.
Check the manufacturer’s instructions or contact customer support to clarify whether your shower head has a flow restrictor.
If you find your shower head has a pre-existing flow restrictor, stop installing and find out how to remove the old flow restrictor and proceed.
If there is no pre-existing flow restrictor, continue to the next step.
Step 4:
Moving to the next section, disassemble your shower head by removing any screws or nuts holding it together. Here you may need to use pliers or a screwdriver.
Step 5:
After disassembling the shower head and removing the rubber washer, check the inside of the shower head for any debris or mineral buildup. Use a cloth or towel to wipe away any dirt, rust, or buildup that may have accumulated. It will ensure that the restrictor fits appropriately into the shower head and won’t get clogged up with any existing debris.
Once you have cleaned the shower head, you can insert the restrictor and reassemble the shower head.
Step 6:
In step six, locate the water flow restrictor kit containing a restrictor and a rubber washer. Insert the restrictor into the shower head by pushing it into the hole where the rubber washer was previously located. Make sure it is snugly in place.
Step 7:
Now, place the rubber washer onto the back of the shower head, covering the restrictor. Wrap Teflon tape around the threads of the shower arm to ensure a tight seal when reattaching the shower head.
Step 8:
Reattach the shower head to the shower arm by screwing it in a clockwise direction. Use pliers or a wrench to ensure a tight fit, but be careful not to overtighten.
Step 9:
Finally, turn on the water supply to the shower and test the water flow. If the flow is still too high, you can adjust the restrictor by removing it and using pliers to slightly enlarge the hole in the center. Reinstall the restrictor and test the water flow again.
Step 10:
If the water flow is satisfactory, clean up any debris or water that may have accumulated during installation.
That’s it! You have successfully installed a water flow restrictor.
Few Tips for Testing and Adjusting the Water Flow Restrictor:
- Before installing the flow restrictor, measure the water flow rate of your shower head using a flow meter, stopwatch, and bucket. Record this measurement for later comparison.
- After installing the flow restrictor, test the water flow rate again using the same method as before. Compare this measurement to the one you took before installation. If the flow rate has decreased significantly, you have installed the flow restrictor successfully.
- If the flow rate is too low, you can adjust the flow restrictor to allow more water. You can do this by twisting or turning the restrictor to increase the opening size. Be careful not to remove the restrictor completely, as this can cause water waste and defeat the purpose of conserving water.
- But in case, the flow rate is too high; you can adjust the flow restrictor to allow less water through. Again, do this by twisting or turning the restrictor to decrease the opening size.
- Test the water flow rate again after making adjustments to ensure it meets your desired flow rate. Remember to conserve water by keeping the flow rate as low as possible while providing enough water for your shower.
How to Choose the Right Water Flow Restrictor
In the below section, we have included a few factors that help you identify the correct water flow restriction for your shower head. Have a look.
1. Determine Your Shower Dead’s Water Flow Rate:
- To determine the water flow rate of your shower head, you can place a container with a known volume under the showerhead and how long it takes to fill.
- Divide the container’s volume by the time in seconds to get the flow rate in gallons per minute (GPM).
- Another option is to check the shower head’s label or packaging for its water flow rate.
2. Choose the Right Flow Restrictor Size:
- Flow restrictors come in different sizes to restrict water flow at different rates.
- Choose a flow restrictor that matches or slightly reduces the water flow rate of your shower head to achieve optimal water conservation.
- For example, if your showerhead has a flow rate of 2.5 GPM, you could choose a flow restrictor that reduces the flow rate to 2.0 GPM.
3. Consider the Type of Showerhead:
- Different types of showerheads may require different types of flow restrictors.
- For instant, some showerheads have built-in flow restrictors, and you cannot remove them, while others have removable ones.
- Consider the showerhead type and whether you need a flow restrictor that can install or replaced easily.
- Some showerheads may also require specific flow restrictor sizes, so it’s essential to choose the right one for your showerhead.
Some Common Issues Related to Water Flow Restrictors and Some Troubleshooting Ideas:
1. After a few days of installing the water flow restrictor, you may experience low water pressure. In such a situation, try to remove the flow restrictor and clean it thoroughly to remove any debris or clogs. On the other hand, it also happens when the flow restrictor restricts too much water. For this, replace the flow restrictor with a higher flow rate.
2. Secondly, you might face a leaky shower head if you need to tighten it properly during installation. In that case, check to ensure the showerhead is tightly screwed onto the arm. Use Teflon tape on the threads to ensure a tight seal. After all, if the showerhead is still leaking, check the gasket inside the showerhead for damage or wear and replace it if necessary.
3. Sometime you unknowingly install a damaged flow restrictor, which may need replacing. If it happens, remove the flow restrictor and inspect it for cracks or damage. If you find any damage, purchase a new one the same size as the old one and install it following the method mentioned above.
Frequently Asked Questions
What is the ideal water flow rate for a shower head?
Answer: A showerhead’s ideal water flow rate depends on personal preference. But using a flow rate of 2.5 gallons per minute (GPM) or lower is recommended to conserve water.
Will installing a flow restrictor affect my shower’s performance?
Answer: Installing a flow restrictor may reduce the water flow rate and affect the shower’s performance. However, it can also help conserve water and save money on water bills.
How often should I clean my flow restrictor?
Answer: You should clean your flow restrictor every six months to prevent clogging and ensure optimal water flow.
Can I remove the flow restrictor permanently?
Answer: You can remove the flow restrictor permanently, but it is not a good idea, as it can waste water and increase water bills. Some showerheads also require flow restrictors to comply with plumbing codes and regulations.
Conclusion
Water is a precious resource that we cannot take for granted. While 70% of the earth’s surface is covered with water, only 2.5% is freshwater, and only 1% is accessible for human use. With that said, by restricting the water flow, you can save up to 50% of the water used during a shower without sacrificing the quality of your shower experience.
Additionally, it can help protect our environment and ensure enough water for future generations.
However, we have elaborately described how to install water flow restrictor in shower head. So, enjoy your shower and help the world by saving water.
Paul Newman is a blogger who writes about plumbing and home improvement. Over the past 20 years, I have worked as a plumber. My passion is to share my knowledge and experience with others to improve their homes.


