When your kitchen sink soap dispenser not working, you surely face trouble cleaning dishes and vegetables and consequently drowning in hygiene and wellness issues.
Since the kitchen sink soap dispenser is not only a device, rather it plays a great role in your everyday life.
But why it happens?
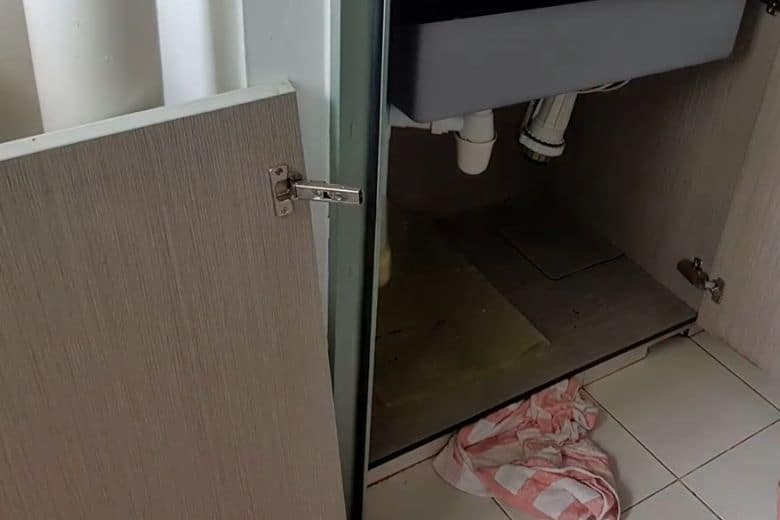
Usually, a soap dispenser sink operates using a simple mechanism. It consists of a container or bottle filled with liquid soap or detergent. A pump mechanism is connected to the bottom of the bottle, and a hose runs from the pump to the dispenser nozzle, which is mounted on the sink.
Pressing the pump creates a vacuum and draws soap up from the bottle and into the hose. As the pump is released, the soap is forced out of the dispenser nozzle and onto the sink, and you can use it for washing.
But sometimes, the dispenser stops working due to a malfunctioning or clogged nozzle, faulty pump mechanism, loose or broken connection, and even for low soap in the bottle.
No matter the reason, you must identify it and solve the problem as soon as possible. Eventually, we are here to help you.
Let’s see the reason why the kitchen sink dispenser stops working and how to solve it.
Why is the Kitchen Sink Dispenser Not Working?
As we already indicate, soap dispensers can stop working for a few reasons. In this section, we have discussed each reason elaborately and then moved to the solution section. Without wasting time, let’s see them.
Empty Soap Container: Before concluding that your kitchen sink dispenser has to get wasted, check if the dispenser has run out of soap. Are the container needs refilling? Because it often happens that low soap in the dispenser bottle can’t release the adequate liquid soap you need.
Clogged Nozzle: Another reason for the sink dispenser not working can be a clogged nozzle. Generally, the nozzle clogs due to dry soap and debris, and it occurs when you omit to clean the nozzle regularly. As a result, it hinders the soap dispenser from working properly.
Loose or Broken Connections: The dispenser may have loose or broken connections between the pump and the container or between the container and the dispenser nozzle, which can cause the soap to leak or not dispense correctly.
Damaged or Worn-Out Parts: With time, the dispenser parts may become damaged or worn out, leading them to stop working. In most cases, when the dispenser has been exposed to water or moisture for a long time, the metal parts may become corroded, causing the dispenser to malfunction and the pump is stuck and not work.
Soap Dispenser not Properly Installed: If you recently installed a new soap dispenser or replaced the old one. Then there may be a problem with the installation. Check that the pump is securely attached to the bottle and that the nozzle is properly mounted on the sink. Because when the soap dispenser is not properly installed, it cannot dispense soap.
Air in the system: Thus, when the air gets trapped in the dispenser system, preventing the soap from flowing properly. Try pumping the dispenser several times will help to remove any air bubbles.
Signs of a Kitchen Sink Soap Dispenser Not Working
Although when the dispenser stops producing soap is a big sign that the kitchen sink soap dispenser is not working. Despite this clear indication, there are a few signs you can notice to ensure your soap dispenser has a problem.
- No soap comes out with the push of the dispenser button.
- Weak or inconsistent soap flow.
- Soap leaking from the dispenser, whether under a sink or from the bottom part.
- Difficulty filling the soap container or slow filling.
- The soap in the dispenser dries up quickly.
- Soap dispenser pumps making noise but not dispensing soap.
How to Solve the Problem of Kitchen Sink Soap Dispenser Not Working
Fixing the invalid soap dispenser is easy until there is no big issue with replacement and you have basic knowledge about the system. Here we have included a few problems solution. Have a look at what you need.
Solution 1: For Empty Soap Container
The empty and low soap dispenser bottle requires refilling to work again. This is very simple; follow the manufacturer’s instructions or the below step. Make sure the soap is the correct consistency for your dispenser.
- Locate the soap dispenser bottle under the sink.
- Remove the soap dispenser bottle from its mounting bracket or holder.
- Unscrew the pump mechanism from the top of the soap dispenser bottle.
- Fill the soap dispenser bottle with liquid soap or detergent, leaving some space at the top for the pump mechanism.
- Screw the pump mechanism back onto the top of the soap dispenser bottle.
- Reinstall the soap dispenser bottle in its mounting bracket or holder.
- Test the dispenser pump by pressing it a few times to ensure the soap comes from the nozzle.
Solution 2: Clearing a Clogged Soap Dispenser Nozzle
The next solution we have included is for those struggling with a clogged soap dispenser nozzle. Here is the process of how to unclog the soap dispenser nozzle.
Tools you Needed:
- Warm water
- Small brush or toothbrush
- Paper clip or safety pin (if necessary)
- Very first you have to remove the soap dispenser bottle from under the sink. Therefore, ensure it is filled with liquid soap or detergent.
- In the next step, you need to check the nozzle for any visible signs of blockage or debris.
- Now use warm water to rinse the nozzle and remove any loose debris or residue.
- After washing, if the nozzle is still clogged, use a small brush or toothbrush to scrub the inside of the nozzle to remove any built-up residue.
- In case the clog is particularly stubborn, you may need to use a paper clip or safety pin to poke through the clog and dislodge it gently. You can also use a strong needle for this job.
- Rinse the nozzle thoroughly with warm water to ensure that all debris has been removed.
- Finally reinstall the soap dispenser bottle under the sink and test whether it works correctly.
Solution 3: For Loose Connections
Although fixing the loose kitchen soap dispenser is simple, you just need the proper tool and full attention here. So be careful to follow the step attentively.
Tools you Needed:
- Wrench
- Screwdriver
- Pilers
- Teflon tape
- Cleaning cloth
- Flashlight (if there is not enough light)
- Before starting the process, turn off the power supply to the kitchen sink area to ensure your safety.
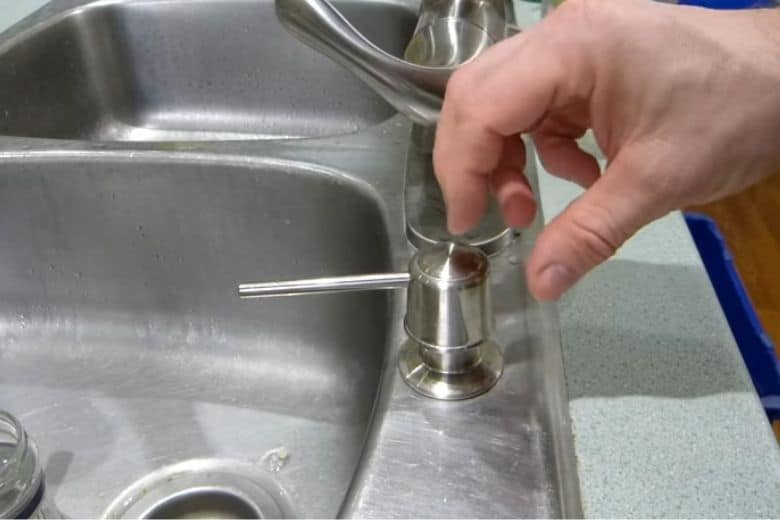
- Now begin the wok by using a screwdriver. Remove the soap dispenser pump from the sink by unscrewing any screws that are holding it in place.
- After removing the pump, check all connections to see if any are loose or broken. Use a wrench or pliers to tighten any loose nuts or connections.
- Again, check the tube that runs from the soap dispenser to the sink. Make sure it is not kinked or bent, as this can prevent soap from flowing properly. If it is kinked, use pliers to straighten it out.
- If any threads are loose or wobbly, wrap them with Teflon tape to create a tighter seal.
- Once all connections are checked and tightened, reattach the dispenser pump to the sink by screwing it back into place with a screwdriver.
- After the pump is securely attached, turn on the power supply and test the soap dispenser to ensure it works properly.
- Clean any tools or debris from the area and dispose of any old or unused soap.
Solution 4: Replacing the Soap Dispenser Pump
Replacing the soap dispenser worn part is very easy and straightforward work. You need to follow the mentioned step carefully. Let’s start.
Tools needed:
- New soap dispenser pump
- Wrench (if necessary)
- Detect the mounting nut that secures the soap dispenser pump to the sink.
- If needed use a wrench to loosen the mounting nut and remove the soap dispenser pump from the sink.
- Remove the old pump mechanism from the soap dispenser bottle by unscrewing it from the top.
- Therefore, screw the new pump mechanism onto the top of the soap dispenser bottle.
- Next, insert the soap dispenser pump into the mounting hole on the sink and secure it with the mounting nut.
- Now, tighten the mounting nut with a wrench (if necessary) until the soap dispenser pump is snug against the sink.
- Test the dispenser pump by pressing it a few times and check for any leaks around the base of the soap dispenser.
Solution 5: Reinstalling the Soap Dispense
This solution will apply when you need to replace your soap dispenser or reinstall it accurately. Here are step-by-step instructions for reinstalling the soap dispenser.
Tools needed:
- Adjustable Wrench
- Flight light (if necessary)
- Cleaning cloth
- Plumber’s putty or Silicone sealant
- Like other methods, you also need to remove the soap dispenser bottle from under the sink.
- Locate the mounting nut that secures the soap dispenser to the sink. Before that, ensure the soap dispenser bottle is filled with liquid soap or detergent.
- Use a wrench to loosen the mounting nut and remove the soap dispenser from the sink.
- Clean the mounting area on the sink with a damp cloth to remove any debris or residue.
- Apply a small amount of plumber’s putty or silicone sealant to the underside of the soap dispenser mounting flange.
- Insert the soap dispenser into the mounting hole on the sink and secure it with the mounting nut.
- Tighten the mounting nut with a wrench until the soap dispenser is snug against the sink.
- Reinstall the soap dispenser bottle under the sink.
- Finally, test the dispenser pump and ensure there are no leaks.
Preventing Future Kitchen Sink Soap Dispenser Issues
You can’t prevent this issue from happening in the future fully, but you can take action to prevent it frequently.
- Always try to use high-quality liquid soap or detergent to prevent clogging of the dispenser nozzle.
- Remember to refill the soap dispenser bottle before it runs out. It will prevent air from getting into the pump mechanism and cause it to become unprimed.
- Clean the soap dispenser nozzle regularly with warm water and a small brush to prevent clogs.
- Avoid using abrasive cleaners or scouring pads on the soap dispenser nozzle or pump mechanism, as this can damage them.
- Check the soap dispenser pump and hose for leaks periodically and address them promptly to prevent damage to your sink or counter.
Frequently Asked Questions
Can I use any soap in my kitchen sink soap dispenser?
Answer: While most liquid soaps and detergents are suitable for use in a kitchen sink soap dispenser, low-quality or thick soaps may cause clogs. It’s best to use a high-quality, low-viscosity soap to prevent issues with the dispenser.
How often should I clean my kitchen sink soap dispenser nozzle?
Answer: It’s a good idea to clean the nozzle of your kitchen sink soap dispenser regularly, such as once a week, to prevent clogs and ensure proper functioning. However, you may need to clean it more often if you notice any buildup or clogs.
Can I fix a broken soap dispenser pump or do I need to replace it?
Answer: In some cases, a broken soap dispenser pump can be fixed by disassembling and cleaning the pump mechanism. However, if the pump is severely damaged or worn, it may need to be replaced.
Conclusion
In summary, a kitchen sink soap dispenser is a convenient and efficient way to dispense liquid soap or detergent directly into the sink. However, several common issues are responsible for kitchen sink soap dispenser not working. But our article helps you to solve the issue quickly and fully. Best of luck!
Paul Newman is a blogger who writes about plumbing and home improvement. Over the past 20 years, I have worked as a plumber. My passion is to share my knowledge and experience with others to improve their homes.