Having a clean and well-maintained bathroom is essential for a healthy and pleasant environment. But when it comes to maintaining a clean and fresh bathroom. Most of the time, we overlooked the cleaning importance of the bathroom exhaust fan.
We often forget that dust, dirt, mold growth and debris accumulate on the exhaust fan blades and housing with time. As a result, it is reducing its efficiency and potentially causing unpleasant odors.
However, regularly cleaning your bathroom exhaust fan ensures proper ventilation and promotes a healthier environment.
So, without further talk, let’s look for step-by-step instructions on how to clean exhaust fan in the bathroom.
Signs That Your Exhaust Fan Needs Cleaning
You must identify a few signs before cleaning your bathroom exhaust fan. These signs will indicate the emergency or necessity of cleaning the fan. Have a look.
1. Poor Air Circulation:
One of the primary functions of a bathroom exhaust fan is to circulate air. With this function, it removes moisture, odors, and pollutants. If you notice that the air circulation has weakened, or the exhausted fan is not pulling air at all.
It is a sign that your exhaust fan is clogged and needs cleaning. Reduced airflow can increase humidity, lingering odors, and a less comfortable bathroom environment.
2. Unusual Noises:
A well-maintained exhaust fan operates quietly and smoothly. If you hear unusual sounds such as rattling, grinding, or squeaking noises when your fan is operating. Because dirt and debris cause the fan to become unbalanced and increase noise levels.
Therefore, it could be another sign the fan blades or motor need attention. Ignoring these noises may lead to further damage or even complete fan failure. So, it is vital to address the issue promptly.
3. Accumulation of Dust and Grime:
When the exhaust fan is dirty, it can become a magnet for dust accumulation. Meanwhile, if you observe a layer of dust on the fan cover or notice visible dirt and debris on the fan blades. It is a clear sign that the fan needs cleaning.
4. Persistent Odors:
An exhaust fan that requires cleaning often struggles to remove odors effectively. The result in lingering smells in the bathroom. The accumulation of dust, dirt, and grime on the fan blades can limit its ability to expel odors efficiently.
Consequently, leading it to a less pleasant bathroom environment.
5. Water Stains or Mold Growth:
Over time, moisture from the bathroom can cause water stains or even mold growth on the surface of the exhaust fan. If you notice any discoloration, water spots, or visible mold on the fan cover or surrounding areas.
It is a strong indication that the fan needs cleaning. Mold growth indicates poor ventilation and poses health risks, so addressing the issue as soon as possible is crucial.
How to Clean Exhaust Fan in the Bathroom (Step-by-Step Guide)
We have described how to clean an exhausted fan in the bathroom with light and without light. Before you begin cleaning your bathroom exhaust fan, let’s see the process.
Gather the Following Tools and Materials:
- Step ladder or stool
- Screwdriver (specific to your fan model)
- Soft-bristle brush or vacuum cleaner with a brush attachment
- Mild detergent or cleaning solution
- Microfiber cloth or sponge
- Safety goggles (optional)
- Cleaning gloves (optional)
- Compressed air canister (optional)
1. Preparation and Safety Precautions
- Ensure your bathroom is well-ventilated by opening a window or turning on an additional fan.
- Put on your safety glasses, goggles, dust mask, or respirator to protect your eyes and respiratory system from dust and debris.
- Place the step ladder or stool beneath the exhaust fan for easy access.
Step 2: Remove the Fan Cover
- Use a step ladder or stool to reach the exhaust fan.
- Now find the screws holding the fan cover in place. Typically, these screws are located along the edges of the cover.
- Use the appropriate screwdriver to remove the screws. Place them in a safe spot to avoid misplacing them.
- Place the screws in a safe spot to avoid misplacing them.
- Gently pull the fan cover away from the ceiling or wall. Exposing the fan blades and the interior of the exhaust fan.
Step 3: Clean the Fan Cover
- Fill a basin or sink with warm water and a mild detergent or cleaning solution.
- Submerge the fan cover in soapy water. Let the fan cover soak for a few minutes to loosen dirt and grime.
- Take a soft-bristle brush or sponge. Next, slowly scrub the fan cover to remove accumulated dust or residue.
- Rinse the cover thoroughly with clean water. After that, wipe it dry with a microfiber cloth or allow it to air dry completely before reinstalling.
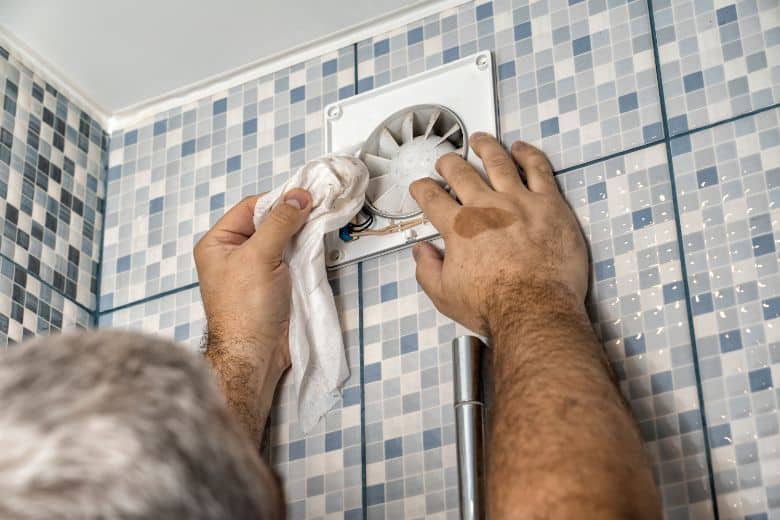
Step 4: Clean the Fan Blades
- With the fan cover removed, you can access the fan blades.
- Again, take a soft-bristle brush or a vacuum cleaner with a brush. Attach it carefully to remove dust or debris from the blades.
- If using a vacuum cleaner. Ensure it is set to low suction and use the brush attachment to remove dirt and dust from the blades.
- Gently vacuum the fan blades using a brush attachment to remove loose dust and debris.
- For more stubborn dirt, use a soft-bristle brush to carefully scrub the blades, ensuring not to bend or damage them.
- If using a brush, gently brush the blades, paying attention to the edges and corners.
- You can use a compressed air canister to remove any remaining dust or debris from hard-to-reach areas.
Step 5: Clean the Interior or Fan Housing of the Exhaust Fan
- Now check the interior of the exhaust fan for dust or debris accumulation.
- Use the brush attachment of your vacuum cleaner. On the other hand, you can also use a soft-bristle brush to clean the interior surfaces of the fan housing.
- Pay extra attention to the vents and crevices where dirt tends to accumulate.
- Be thorough but gentle to avoid damaging any components.
Step 6: Reassemble the Exhaust Fan
- Once you have completed cleaning the fan cover, blades, and interior. It’s time to reassemble the exhaust fan.
- Carefully align the fan cover with the fan housing and gently press it back into place.
- Secure the fan cover by reinstalling the screws in their respective positions.
- Double-check that all screws are securely tightened.
Step 7: Test the Exhaust Fan
- Turn the power supply back on by switching on the circuit breaker for your bathroom.
- Flip the switch for the exhaust fan to verify that it functions correctly.
- Listen for unusual noises or vibrations. Because it will indicate that the fan was not reassembled properly.
- If everything appears to be in order, congratulations! You have successfully cleaned your bathroom exhaust fan.
Safety Precautions
- Switch off the power line to prevent accidental electrical shocks while cleaning.
- Wear gloves and safety glasses to shield yourself from dust, debris, or cleaning agents.
- Use a sturdy step ladder or stool to reach the fan comfortably. Ensure it is placed on a stable surface. Follow the manufacturer’s weight capacity guidelines.
Additional Tips
- Clean your bathroom exhaust fan at least twice yearly to maintain optimal performance.
- Consider using compressed air to blow away dust from hard-to-reach areas or crevices.
- If you notice any unusual noises or reduced airflow. It might be a sign of a malfunctioning fan motor. In such cases, consult a professional for repairs or replacements.
Frequently Asked Questions
Can I use harsh chemicals to clean the fan?
Answer: It’s best to avoid harsh chemicals when cleaning your fan. As they can potentially damage the fan’s components. Instead you can use mild cleaning solutions or a mixture of water and vinegar.
Can I clean the fan while it is connected to the power supply?
Answer: No, switching off the power to the bathroom before starting the cleaning process is crucial to avoid any electrical hazards.
Is it necessary to clean the cover separately?
Answer: Clean the cover separately, ensuring it is free from dust and stains. It also prevents any accumulated debris from falling into the fan while reassembling.
Is it necessary to clean the ductwork?
Answer: Cleaning the ductwork is important for maintaining optimal airflow and preventing mold growth. It’s recommended to have the ductwork professionally cleaned every 3 to 5 years or as needed.
What if my exhaust fan still doesn’t work properly after cleaning?
Answer: In that case, your fan continues to have performance issues after cleaning. It may be necessary to troubleshoot further or seek professional assistance. Faulty wiring, motor damage, unsealed fan area or other mechanical issues could be causing the problem.
Conclusion
Cleaning the exhaust fan in your bathroom is essential for every homeowner. Since it ensures a healthy and pleasant bathroom environment, this guide on how to clean exhaust fan in the bathroom will minimize all your cleaning problems. Follow this step-by-step guide to extend the lifespan of your bathroom exhaust fan and enjoy a fresh and comfortable space.
Paul Newman is a blogger who writes about plumbing and home improvement. Over the past 20 years, I have worked as a plumber. My passion is to share my knowledge and experience with others to improve their homes.