Proper ventilation is compulsory for maintaining a healthy and comfortable environment in any bathroom. Consequently, the key component of effective bathroom ventilation is the exhaust fan. Because it helps to remove excess moisture, odors, and pollutants from the air.
However, simply installing the fan is not enough. Proper sealing around the exhaust fan is essential to ensure optimal performance. Since proper sealing prevents issues such as air leaks, mold growth, water damage, and energy loss.
With that said, this guide aims to provide you with a step-by-step approach on how to seal around bathroom exhaust fan. Following these instructions, you can create an airtight seal and enjoy a well-ventilated bathroom.
Why is Sealing Around a Bathroom Exhaust Fan Important?
A bathroom exhaust fan is typically installed in the ceiling or on a wall. It is connected to a ventilation duct that leads outside. When the fan is turned on, it draws air from the bathroom, including moisture-laden air from showers or baths, and expels it outside.
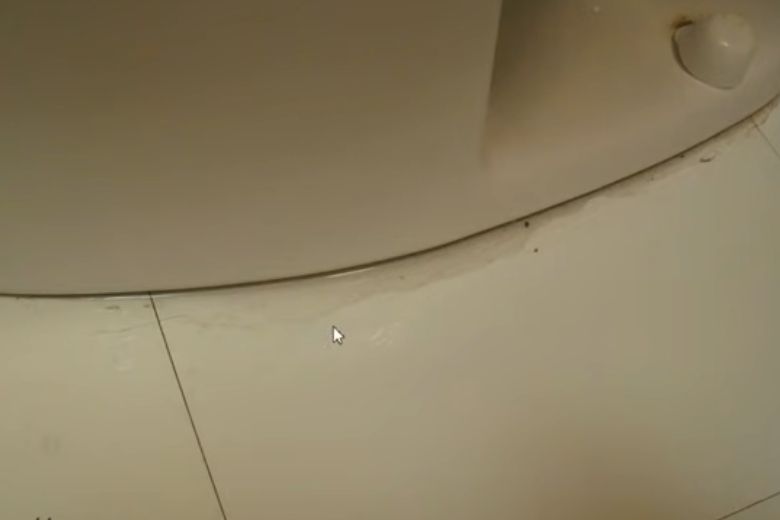
Eventually, if there are gaps or improper seals around the fan, several issues can arise:
1. Air Leaks:
Gaps or cracks around the exhaust fan allow air to escape. As a result, the fan’s efficiency in removing moisture and odors is reduced. It can lead to prolonged dampness, mold growth, and unpleasant odors in your bathroom.
2. Water Damage:
When the water vapor from the bathroom is not properly vented outside. It can condense on cold surfaces, such as the exhaust fan housing. Over time, this can lead to water damage, rot, and the growth of mold and mildew.
3. Energy Loss:
Air leaks around the exhaust fan can contribute to energy loss. As conditioned air from inside the house escapes through the gaps. It can increase your energy bills and strain your HVAC system.
4. Water Leaks:
Gaps around the exhaust fan can allow water to infiltrate. It especially happens during heavy rainfall or when condensation forms on the ductwork. Water leaks can damage your ceiling, walls, and insulation, leading to costly repairs.
5. Mold and Mildew:
The most common problem for unsealed exhaust fans is the attraction of mold and mildew. Yes, moisture entering unsealed areas can accumulate in the ceiling or walls. Therefore, promoting the growth of mold and mildew.
These can cause health issues and further damage to your bathroom’s structure.
6. Reduced Ventilation Effectiveness
Gaps around the exhaust fan can compromise its ability to remove moisture and odors from the bathroom efficiently. It may result in lingering smells, increased humidity, and a less comfortable environment.
7. Increase Bad Odor
Ventilation helps eliminate unpleasant odors by extracting them from the bathroom and directing them outside. The unsealed exhausted fan cannot remove the odor properly. As a result, the unwanted odor in your bathroom makes you uncomfortable breathing.
How to Seal Around a Bathroom Exhaust Fan
You can seal around the bathroom exhaust fan in a few ways. According we have included 5 methods that are effective and easy to apply. Have a look at which suit your situation.
Method 1: Use Caulk to Seal Around A Bathroom Exhaust Fan
To apply caulk to seal around a bathroom exhaust fan, follow these steps:
Gather the Necessary Materials:
- A tube of silicone-based caulk
- caulk guns
- Utility knifes
- A damp cloth or sponge for cleaning up
Step 1: Prepare the Area
Ensure the bathroom is well-ventilated, and turn off the exhaust fan. Use a ladder or step stool to reach the fan housing safely.
Step 2: Inspect and Clean
Inspect the area around the fan housing for any existing caulk or debris. Remove all old caulk or loose material using a utility knife or scraper. Clean the surface thoroughly with a damp cloth or sponge to remove dust, grease, or dirt. Allow the area to dry completely.
Step 3: Load the Caulk Gun
Insert the caulk tube into the gun and pull back the rod to secure it. Cut the caulk tube’s tip at a 45-degree angle, making a small opening. The opening size will depend on the gap you need to fill.
Step 4: Apply the Caulk
Hold the caulk gun at a 45-degree angle and position the nozzle against the joint between the fan housing and the ceiling. Squeeze the caulk gun’s trigger to release a steady flow of caulk. Apply a continuous bead of caulk around the entire perimeter of the fan housing.
Step 5: Smooth the Caulk
Wet your finger or use a caulk tool to smooth it immediately after applying it. It will create a neat and even seal. Remove excess caulk from your finger or the tool and continue smoothing until you achieve a clean finish.
Step 6: Clean Up
Wipe away any excess caulk or smudges using a damp cloth or sponge. Be careful not to disturb the freshly applied caulk.
Step 7: Allow the Caulk to Dry
Refer to the caulk manufacturer’s instructions for the recommended drying time. Avoid using the exhaust fan until the caulk is fully cured.
Remember to follow safety precautions and work in a well-ventilated area when using caulking materials.
Method 2: Use Sealant to Seal Around the Bathroom Exhaust Fan
To apply a sealant to seal around a bathroom exhaust fan, here’s what you need to do:
The Necessary Materials:
- Sealant (such as silicone or latex-based)
- A caulk guns
- Utility knife
- A Damp Cloth or Sponge.
Step 1: Prepare the Area
Like the caulking method, ensure ventilation and power off the exhaust fan. Take a ladder or step stool to access the fan housing.
Step 2: Examine and Clean
Examine the area of the fan housing for existing sealant, debris, or dirt. If you find any, then remove old sealant or loose material. For cleaning, use a utility knife. Next, clean the surface properly with a cloth or sponge to remove dust, grease, or grime. Allow the area to dry completely.
Step 3: Load the Sealant Tube into the Caulk Gun
To load the sealant tube into the caulk gun, insert it into the caulk gun and retract the rod to secure it. Then, using a utility knife, cut the tip of the sealant tube at a 45-degree angle, creating a small opening. The opening size should be determined based on the gap width you intend to fill.
Step 4: Apply the Sealant
To apply the sealant, hold the caulk gun at a 45-degree angle. Next, align the nozzle with the joint where the fan housing meets the ceiling. Now squeeze the trigger of the caulk gun to release the sealant. Proceed to apply a smooth, continuous bead of sealant along the entire edge of the fan housing. Be careful to maintain an even application as you go.
Step 5: Finish the Sealant
After applying the sealant, you can use a dampened finger or a caulk tool to smooth the sealant promptly. This step ensures a tidy and uniform seal. Remember to eliminate all excess sealant from your finger or the tool as you continue to smooth. Aiming for a polished result.
Step 6: Fresh Up
Use a damp cloth or sponge to wipe away any excess sealant or smudges. Take caution to avoid disturbing the freshly applied sealant while cleaning up.
Step 7: Wait for the Sealant to Dry
Read the instructions provided by the sealant manufacturer to determine the recommended drying time. Be careful to refrain from using the exhaust fan until the sealant has completely cured.
Note:
Always follow safety precautions and work in a well-ventilated area when using sealants. Additionally, read and follow the instructions provided by the specific sealant product you are using.
Method 3: Use a Gasket to Seal Around Bathroom Exhaust Fan
To apply a gasket and seal around a bathroom exhaust fan, follow these steps:
- Ensure the fan is turned off and the bathroom is well-ventilated.
- Remove the fan cover or grille to access the fan housing.
- Check if your bathroom exhaust fan includes a gasket. Some fans come with a pre-installed gasket, while others may have a separate gasket that needs to be placed.
- If the gasket is separate, carefully place it onto the fan housing. Now aligning it with the edges where the fan housing meets the ceiling. Ensure the gasket covers the entire perimeter of the fan housing.
- Press the gasket firmly against the fan housing and the ceiling to create a seal. Confirm it adheres properly and sits flat.
- Reinstall the fan cover or grille. Ensuring it fits snugly and securely over the fan housing with the gasket in place.
- Test the fan to ensure it is functioning properly.
Note:
If your bathroom exhaust fan didn’t come with a gasket and you wish to add one for better sealing. You can purchase a suitable gasket from a hardware store or online. Follow the manufacturer’s instructions for applying the gasket and ensure it matches your specific fan model.
However, consult a professional for assistance if you need clarification on any step or the proper technique.
Method 4: Use Weatherstripping For Sealing Around the Exhausted Fan
Before applying weatherstripping make sure you have all the necessary things.
The Needed Materials
- Adhesive-backed weatherstripping
- Utility knife
- A clean cloth
- A mild household cleaner (if needed).
Step 1: Ready the Place
Like the other three methods, ensure the bathroom is ventilated and turn off the exhaust fan. After that, reach the fan housing using ladder or step stool.
Step 2: Clean the Surface
Thoroughly clean the area around the fan housing using a mild household cleaner and a clean cloth. Remove ALL dust, grease, or debris to ensure proper adhesion of the weatherstripping.
Step 3: Measure and cut the Weatherstripping
Measure the length of each side of the fan housing where you intend to apply the weatherstripping. Cut the weatherstripping into strips of the corresponding length using a utility knife.
Step 4 Peel off the Backing
Peel off the backing paper from the adhesive side of the weatherstripping, exposing the sticky surface.
Step 5: Apply the Weatherstripping
After applying the weatherstripping, press along the entire length to ensure a secure bond. Please pay attention to any corners or gaps and press firmly to seal them effectively.
Step 6: Secure the Weatherstripping
After applying the weatherstripping, press along the entire length to ensure a secure bond. Pay attention to any corners or gaps and press firmly to seal them effectively.
Step 7: Test the Fan
Finally, run the exhaust fan to ensure it functions properly without any obstruction from the weatherstripping. Make sure the fan operates smoothly and does not make excessive noise.
Note:
Weatherstripping helps create an airtight seal around the fan housing, preventing air leakage. It also helps to reduce drafts and improve energy efficiency.
If you need to remove or replace the weatherstripping in the future. Gently peel it off from one end, taking care not to damage the surface of the fan housing or ceiling.
Remember to follow safety precautions. Ensure work in a well-ventilated area when applying weatherstripping or other materials to your bathroom exhaust fan.
Method 5: Use Duct Tape to Seal Around the Bathroom Exhaust Fan
Although it is not the most aesthetic option. But duct tape can be used as a temporary solution to seal around the exhaust fan. Here’s how to apply it:
- Ensure the bathroom is well-ventilated and turn off the exhaust fan.
- Clean the area around the fan housing using a mild household cleaner and a clean cloth to remove any dust, grease, or debris.
- Cut strips of duct tape to the desired length, ensuring they are long enough to cover the gaps around the fan housing.
- Hold one end of the duct tape against the fan housing where it meets the ceiling, ensuring it covers the gap completely.
- Press the duct tape firmly against the fan housing, smoothing it out to ensure good adhesion.
- Continue applying strips of duct tape around the entire perimeter of the fan housing, overlapping them slightly to ensure complete coverage.
- Smooth any wrinkles or bubbles in the duct tape to create a tight seal.
Note:
It’s important to note that duct tape is not a permanent solution for sealing around a bathroom exhaust fan. Over time, the adhesive may weaken, and the tape may deteriorate due to moisture and humidity. Using more appropriate sealing materials like caulking, sealant, or weatherstripping is recommended for a long-lasting and effective seal.
Consider using duct tape as a temporary fix until you can apply a more suitable sealing method or consult a professional for assistance.
Common Mistakes to Avoid During or Before the Sealing Process
During the sealing process around your bathroom exhaust fan, it’s important to be aware of common mistakes and take steps to avoid potential problems. Here are some common errors to watch out for, along with tips for avoiding them and troubleshooting common issues:
- Failing to clean and prepare the surface properly can result in poor adhesion.
- Selecting an appropriate sealant or weatherstripping for the specific application can lead to effective sealing.
- Not identifying and addressing gaps or cracks around the exhaust fan can result in air leaks.
- Using excessive or insufficient sealant can affect the effectiveness of the seal and may lead to messy application.
- Not following the recommended drying time or specific application instructions provided by the sealant manufacturer can impact the quality of the seal.
- Taking shortcuts or rushing through sealing can lead to mistakes and subpar results.
- Using sealants or weatherstripping that are expired or damaged can compromise their effectiveness.
By avoiding these common mistakes, you can ensure a proper and durable seal around your bathroom exhaust fan.
Frequently Asked Questions
What causes leaks around bathroom exhaust fans?
Answer: Leaks around bathroom exhaust fans can be caused by improper sealing, gaps or cracks in the vent opening or fan housing, deteriorated sealant, or issues with the installation of the fan.
Can I use any sealant for sealing around the fan?
Answer: It is recommended to use sealants specifically designed for bathroom environments, such as silicone or latex caulk. These sealants offer moisture resistance and durability suitable for sealing around bathroom exhaust fans.
What kind of tape do you use for an exhaust fan?
Answer: As an insulation adhesive metal tape for various applications, you can use aluminum tape, specifically a 2-inch by 65-feet foil tape with a thickness of 3.9 mils. This high-temperature and heavy-duty HVAC tape is known as silver or aluminum foil.
It is suitable for ductwork, dryer vents, and HVAC systems. It provides a strong adhesive bond and effectively helps seal and insulate these areas.
Conclusion
We have included five different methods to show you how to seal around bathroom exhaust fan. Hopefully, from here you can direct go for your project of sealing around your bathroom exhausted fan. Remember, regular maintenance and inspection of your bathroom exhaust fan. Because it will help identify potential issues and you can address them promptly.
That’s all for Today. Best of Luck!
Paul Newman is a blogger who writes about plumbing and home improvement. Over the past 20 years, I have worked as a plumber. My passion is to share my knowledge and experience with others to improve their homes.