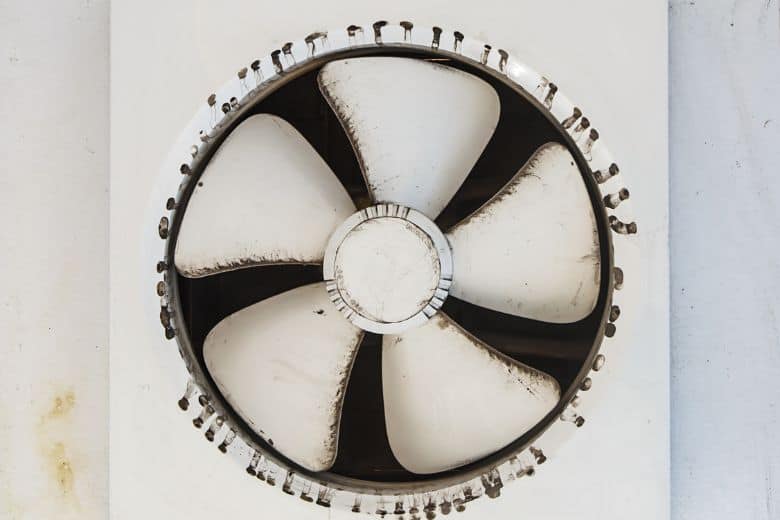
A working kitchen exhaust fan is a fundamental component of any kitchen. Since it helps to remove excess heat, smoke, and odors that may arise during cooking.
However, it is ordinary that sometimes you need to remove the fan. In that situation, you might feel puzzled. Do you need professional help for this job, or can you do it yourself?
Don’t worry. We are here to assist you in this manner. We will provide a step-by-step guide on how to remove kitchen exhaust fan.
It is easy to do if you carefully follow the steps mentioned.
Let’s begin.
Why Remove a Kitchen Exhaust Fan?
Before we get into the details of how to remove kitchen exhaust fan, you must understand why you might need to do so. Here are some reasons why you might need to remove your kitchen exhaust fan:
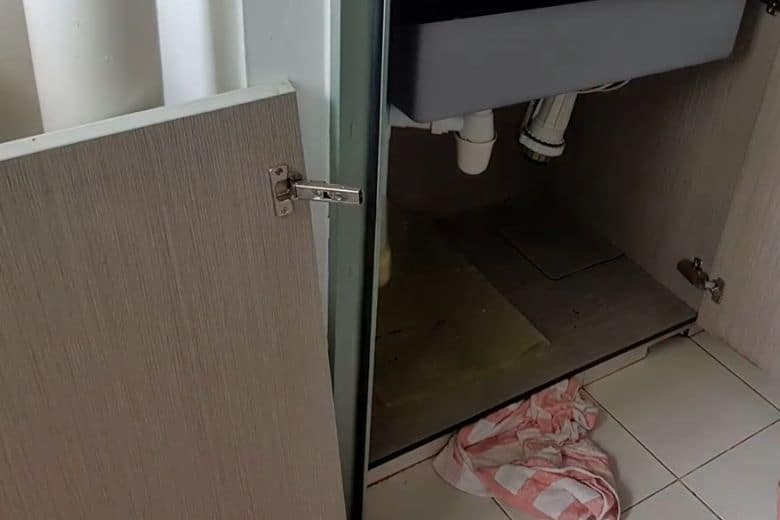
- Cleaning: Kitchen exhaust fans can accumulate a lot of grease and dirt over time. As a result, it can lead to decreased efficiency. Removing the fan can make it easier to clean it thoroughly.
- Remodeling: Secondly, if you are planning to remodel your kitchen. It may need to remove the exhaust fan to access the ductwork or wiring behind it.
- Replacement: Thirdly, when your exhaust fan is old or no longer working correctly. Then you may need to remove it to install a new one.
How to Remove Kitchen Exhaust Fan (Step-by-Step Guide)
To remove a kitchen exhaust fan, you will need the following tools. With these tools in hand, will ready to begin removing your kitchen exhaust fan. Have a look.
Tools Required
- Screwdriver
- Pliers
- Wrench
- Wire stripper
- Voltage tester
- Bucket
- Cleaning solution
- Rag or towel
- Stepladder
Step 1: Turn off the Power
The first step in removing a kitchen exhaust fan is to turn off the power to the fan. It will help prevent electrical shocks or other accidents during removal.
To Turn Off the Power, Follow These Steps:
1. Shutting off the Circuit Breaker: Locate the circuit breaker that controls the power to the kitchen exhaust fan. Flip the switch to the “off” position to shut off the power.
2. Confirming the Power is Off: After you’ve shut off the circuit breaker, use a voltage tester to confirm that the power to the fan is off. Hold the tester against the wires connecting to the fan to confirm no electricity is flowing through them. If the tester beeps or lights up, the power is still on, and you should not proceed with the removal process.
Once you’ve confirmed that the power is off, you can move on to the next step in removing your kitchen exhaust fan.
Step 2: Remove the Cover
The power is off; now you can remove the cover from the kitchen exhaust fan.
Follow these steps:
1. Locate the screws: Look for the screws holding the cover. They are usually located around the cover’s edge or at the fan’s bottom. Use a screwdriver to remove the screws and set them aside.
2. Remove the Cover: Moving forward, gently pull the cover away from the fan. If the cover is stuck, use a putty knife to loosen the adhesive or caulking that may hold it in place.
3. Clean the Cover: After you’ve removed the cover, take the time to clean it. Use warm, soapy water and a soft cloth to wipe away ALL dust or debris. If the cover is particularly dirty, you may need to soak it in soapy water before wiping it down.
4. Set the Cover Aside: Once clean, set it aside safely. You’ll need to reinstall it later.
With the cover removed, you can access the exhaust fan itself and begin the next steps in the removal process.
Step 3: Detach the Fan Blade
With the cover removed, the next step is to detach the fan blade from the motor.
Follow These Steps:
1. Locate the Fan Blade: Look for the fan blade inside the fan housing. Generally, its located near the center of the housing and is attached to the motor by a nut or bolt.
2. Remove the Nut or Bolt: Use a wrench or pliers to loosen and remove the nut or bolt that holds the fan blade in place. Hold onto the fan blade as you remove the nut or bolt to prevent it from falling.
3. Detach the Fan Blade: Mildly pull the fan blade away from the motor to detach it. If the fan blade is stuck, use a penetrating lubricant such as WD-40 to help loosen it.
4. Clean the Fan Blade: When the fan blade is detached, take the time to clean it. Take warm soapy water and a soft cloth to wipe away all dirt.
5. Set the Fan Blade Aside: Once the fan blade is clean, set it aside safely.
With the fan blade detached, you can access the rest of the exhaust fan and begin the next steps in the removal process.
Step 4: Disconnect Electrical Wires
The next step is to disconnect the electrical wires from the exhaust fan.
Follow These Steps:
1. Locate the Wires: Look for the wires that connect the exhaust fan to the power source. You will find it near the motor, which may be covered with a plastic casing.
2. Turn the Wire Nuts Counterclockwise: Use your pliers to turn the wire nuts counterclockwise to loosen them. When the wire nuts are loose, pull the wires apart to disconnect them.
3. Keep Track of the Wires: As you disconnect the wires, keep track of which wire goes where. You can label them or take a picture to make it easier to reconnect them later.
4. Disconnect Other Clips or Connectors: Depending on the model of your exhaust fan, additional clips or connectors may need to be disconnected. Follow the manufacturer’s instructions to disconnect any other components safely.
After the electrical wires are disconnected, you can move on to the final step of removing your kitchen exhaust fan.
Step 5: Remove the Fan Motor
The final step in removing your kitchen exhaust fan is to remove the fan motor from the fan housing.
Follow These Steps:
1. Locate the Mounting Screws: Look for the screws holding the motor. It is located on the sides or top of the fan housing. Use a screwdriver to remove the screws and set them aside.
2. Pull Out the Motor: Once the screws are removed, pull the motor out of the fan housing. Be sure to support the motor with one hand as you remove it to prevent it from falling.
3. Clean the Motor: Take the time to clean it while it’s out of the fan housing. Use a soft brush or compressed air to remove all dust or debris. If it is filthy, you can wipe the motor down with a damp cloth.
4. Keep the Motor Aside: Once the motor is clean, keep it safe aside.
Note: With the motor removed, your kitchen exhaust fan has been successfully taken apart. You can now install a replacement fan or make necessary repairs before reinstalling the fan components.
Step 6: Remove the Housing
After removing the fan motor, the final step is to remove the housing from the ceiling or wall.
Follow these steps:
1. Find Mounting Screws: Look for the screws holding the housing. They’re usually located around the perimeter of the housing or near the center of the housing.
2. Remove the Screws: Use a screwdriver to remove the screws that hold the housing in place. Set the screws aside in a safe place.
3 Pull Away from the Ceiling or Wall: Once the screws are removed, gently pull the housing away from the ceiling or wall. Be sure to support the housing with one hand as you remove it to prevent it from falling.
4. Clean the Housing: Take the time to clean the housing while it’s out of the ceiling or wall. Use warm, soapy water and a soft cloth to remove grease or debris.
Note: With the housing removed, you have successfully taken apart your kitchen exhaust fan. If you’re installing a replacement fan, follow the manufacturer’s instructions for installation. If you’re making repairs, take the time to make any necessary fixes before reinstalling the fan components.
Tips for Easy Removal of Kitchen Exhaust Fan
Removing a kitchen exhaust fan can be a time-consuming process, but several tips can make it easier and quicker:
- Have the Right Tools: Before you begin, ensure you have all the necessary tools, including a screwdriver, pliers, wire cutters, and a ladder if necessary. It will help you avoid having to stop and search for tools mid-project.
- Use a Flashlight: Use a flashlight to illuminate the area around the fan, making it easier to see and work on the components.
- Label the Wires: Use a label or tape to label the wires before disconnecting them to make it easier to identify them during reinstallation.
- Clean as You Go: Clean the components as you remove them using a rag or paper towel. It will help prevent the accumulation of dirt and debris and make it easier to reassemble the fan later.
- Enlist a Helper: If possible, enlist the help of another person to hold the fan motor or help with the removal process. It can make it easier to remove and replace the components.
Frequently Asked Questions
How do I know if my exhaust fan needs to be replaced?
Answer: Some signs that your exhaust fan may need to be replaced include excessive noise, reduced airflow, and difficulty starting or turning off. If you notice any of these issues, you should have a professional inspect your fan to determine if it needs to be replaced.
What are the benefits of installing a new exhaust fan?
Answer: Installing a new exhaust fan can provide several benefits, including improved indoor air quality, reduced humidity, and increased energy efficiency. A new exhaust fan can also help remove unpleasant odors from your kitchen and prevent the accumulation of harmful pollutants and allergens.
Can I clean my kitchen exhaust fan without removing it?
Answer: You can clean your kitchen exhaust fan without removing it. But it may be less effective. Removing the fan allows you to clean it thoroughly and remove any dirt or debris that may have accumulated in the housing.
Can I replace my kitchen exhaust fan myself?
Answer: Yes, you can replace your kitchen exhaust fan, but it may require more advanced skills and tools than a simple cleaning.
Conclusion
Hopefully, you will learn how to remove kitchen exhaust fan. However, it’s a simple process you can do yourself with the right tools and knowledge. Yes, following the steps outlined in this article, you can safely and efficiently remove your kitchen exhaust.
Paul Newman is a blogger who writes about plumbing and home improvement. Over the past 20 years, I have worked as a plumber. My passion is to share my knowledge and experience with others to improve their homes.