
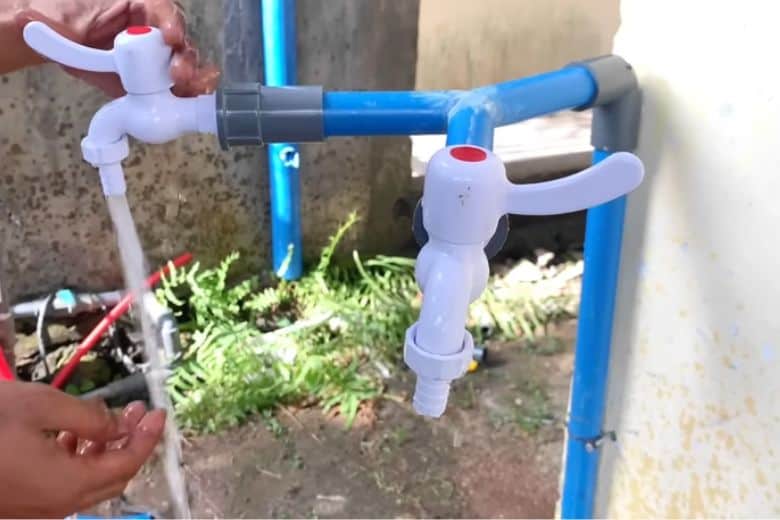
Connecting two faucet supply lines can be intimidating, but it’s easier than it seems. Instead of calling a professional plumber every time, you can take it as a DIY learning task and reduce your dependence on outside help. In this guide, we’ll show you how to connect two faucet supply lines easily and quickly, so you can save both time and money.
A faucet compression fitting is an efficient way to connect two lines. Eventually, you need to purchase the right fitting size based on the line diameters. These fittings are available in various sizes at local hardware stores. It is quite easy to find the correct one for your needs. Once you have the fitting, you can join the lines using simple steps. Remember that some manufacturers may have already provided instructions on connecting the lines, so it’s worth checking before you start.
It will be helpful if you follow our tutorial for connecting two faucet supply lines. Before we begin, let’s review some information about the faucet supply line and compression fittings.
What Is a Faucet Supply Line?
A faucet supply line refers to the waterline that connects the water source in your home to the faucet. Typically, these supply lines are crafted from copper, although some may also be made of PVC (plastic). However, it is worth noting that copper supply lines tend to last longer, albeit at a higher cost, compared to PVC ones. By turning on the faucet, you can observe water flowing through and out of the supply line.
Compression Fittings: Types and Usage
Compression fittings are commonly used to connect pipes and tubes, providing a reliable and secure connection. Three types of compression fittings are available in the market: standard, flare, and push-in.
1. Standard Compression Fittings
Standard compression fittings are the most popular type and are easy to work with. They do not require any modification during installation, making them a preferred choice for many plumbing projects.
2. Flare Compression Fittings
Flare compression fittings are suitable for use in gas and high-pressure supply lines. However, installing these fittings may require additional tools for modification. These fittings are installed at the pipe’s end and sometimes need to be inserted into the pipe itself.
3. Push-in Compression Fittings
Push-in compression fittings are installed by pushing them into the pipe or tubing and twisting them per the project demand. These fittings are easy to install and remove, making them ideal for periodic maintenance. However, excessive stress on these fittings may sometimes cause leaks.
Note: Meanwhile, selecting the appropriate type of compression fitting based on the application requirements is mandatory. Proper installation and periodic maintenance can ensure a reliable and long-lasting connection.
How to Connect Two Faucet Supply Lines (Step by Step Guideline)
Faucet supply lines are the pipes or tubes that run from the wall to the faucet, responsible for supplying water. Before connecting two faucet lines, it is crucial to identify the type of supply line. The hot water supply line is typically larger than the cold-water supply line.
To prevent heat transfer from the hot water supply line to the cold-water line, keeping both lines at least 6 inches apart if there is no insulated hot water supply line is recommended.
Once you have identified the supply lines. You must mention certain essential tools and resources, just as all plumbing jobs require. Then Follow these steps:
Tool You Will Needs
- Measuring tape/ruler
- Compression fitting for faucets/sink taps
- Teflon tape/plumber’s tape/thread seal tape
- Basin wrench/sink wrench
- Pipe cutter/tube cutter or hacksaw
- Pliers (such as slip-joint pliers or channel-lock pliers)
- Pipe bender (If necessary)
Step 1: Shut off the Water Supply
Before connecting the faucet lines, you should turn off the water supply to the faucet to prevent water pressure from making the task more challenging. To do this, locate the valve on the wall closest to the faucet and turn it off.
After you shut off the water supply, drain the lines to avoid any water drops creating a mess during the installation process.
Step 2: Measuring the Water Supply Lines
Accurate measurements are crucial for a successful DIY plumbing project. To determine the length of the supply lines, start by measuring from the faucet connection point to the shutoff valve on the wall. Adding 3-4 inches to the measured distance can provide more flexibility and angle.
However, the additional length needed may depend on the type of water supply line used.
You may need to purchase supply line extensions, If the existing supply lines do not fit well. Don’t worry; this will not restrict the regular water flow to the faucet. In some cases, cutting the supply lines to achieve the desired length may also be necessary. A pipe cutter or hacksaw can be used to cut.
Step 3: Bending the Tubes
Now that you have measured the water supply lines, it’s time to bend the tubing. When bending the tubing, it’s best to avoid bending both ends, as you must connect them to the faucet and valve.
Instead, bend the tubing so that the tube ends have the proper angle to fit with the intake port of the faucet and valve.
Step 4: Connecting the Lines
To connect the water supply lines to the faucet and valve, use a compression fitting and apply the plumber’s tape to lubricate and seal the threaded line joints, also known as Teflon tape.
Begin by properly placing all the necessary tools, such as the faucet’s locking nut, ring, and compression fitting, at the end of the water supply line. Then, attach the faucet to one end of the tube and tighten the nuts securely. Next, connect the opposite end to the discharge port of the shutoff valve and bolt it tightly, using a basin wrench to ensure a tight joint.
To complete the connection, twist the faucet compression fitting and the others on the shutoff valve and hold the valve in place. Use a wrench to turn the fitting clockwise, tightening it as much as possible without putting too much stress on the supply line and faucet. A half or quarter turn should suffice.
Finally, turn on the water supply to check for any leaks. A leak-free faucet line connection is a sign of a successful project.
How Long Does It Take to Connect Two Faucet Lines?
There are several factors to consider when estimating the time required to connect two faucet lines.
Firstly, the length of the supply lines can be a significant factor. Shorter lines can save time for other tasks, whereas longer lines can take longer to connect.
Secondly, the type of faucet can also affect the connection time. A basic single-handle model may require less time, whereas a two-handle model may take more.
Lastly, the experience level of the person performing the task can also play a role. Experts may complete the task more quickly than beginners.
Overall, the entire project can take anywhere from 15 to 30 minutes, depending on the above factors.
Precautions to Take for Connecting Two Faucet Supply Lines
- Always turn off the water supply before starting the project to prevent water damage.
- Drain the supply lines before disconnecting them to avoid any water spillage.
- Use the correct size and type of supply line extensions if needed.
- Be careful while cutting the supply lines to avoid any injury.
- Follow the manufacturer’s instructions while bending the tubes to ensure proper alignment.
- Use a basin wrench to tighten the joints securely without damaging the connections.
- Use the plumber’s tape to lubricate and seal the threaded line joints to prevent leakage.
- Double-check all connections and fittings for leaks after turning on the water supply.
- If you need more confidence in your plumbing skills, hiring a professional plumber to perform the task is best.
Frequently Asked Questions
What is the standard faucet supply line fitting?
Answer: The standard faucet supply line fitting is a compression fitting. This type of fitting creates a watertight seal by compressing a brass ring around the supply line, creating a connection that can be tightened and loosened as needed.
Compression fittings are commonly used in plumbing installations and are available in various sizes to fit different supply line diameters.
What is the faucet connection size?
Answer: The faucet connection or thread size is typically 1/2 inch or 3/8 inch. It refers to the diameter of the threaded part that connects the supply line to the faucet.
The most common size is 1/2 inch, but it’s important to check the manufacturer’s specifications to ensure the correct size is used for your particular faucet.
What is the faucet connection size?
Answer: The faucet connection size typically refers to the diameter of the male or female threads on the end of the faucet where it connects to the water supply line. The most common sizes for residential faucets are 1/2 inch and 3/8 inch.
What is the standard faucet distance?
Answer: The standard faucet distance is 4 inches, measured from the center of the left handle to the center of the right handle. This distance is also referred to as the “center set” measurement.
What pipe type is commonly used for supply lines?
Answer: Copper pipes are commonly used for supply lines due to their durability and resistance to corrosion. Other materials, such as PEX and PVC, are also used, depending on the specific needs and regulations of the plumbing system.
Conclusion
As you were searching for a solution on how to connect two faucet supply lines, you may now understand that it is a fairly simple task. Most homeowners can do it with some basic plumbing knowledge and tools.
However, you may feel unsure or concerned about the risk of damaging the water supply system. In that case, it is recommended to seek assistance from a qualified plumber.
Paul Newman is a blogger who writes about plumbing and home improvement. Over the past 20 years, I have worked as a plumber. My passion is to share my knowledge and experience with others to improve their homes.


