When it comes to household appliances, dryers are incredibly convenient and time-saving. But what happens if you suddenly encounter water leaking from your dryer. Undoubtedly when it happens, it will be quite puzzling and frightening.
But relaxed!
Because water leaking from dryer can happen for various underlying factors. For example, it could be due to a clogged or malfunctioning drainage system. On the other hand, a damaged or misaligned door seal or even a problematic exhaust vent.
No matter what the reason is. Identifying the root cause is crucial to resolve the problem. With that said, we are here to help you.
General Causes for Water Leak from a Dryer
Multiple factors can contribute to this problematic situation when it comes to water leaking from a dryer. By identifying the root cause, you can address the issue more effectively. Here are some common culprits.
1. Clogged Vent System:
A clogged vent system is often the primary culprit behind dryer water leaks. The vent system is responsible for expelling moist air generated during drying. Gradually it began accumulating lint, debris, and other particles and result, obstructing the airflow.
When the airflow is restricted, condensation can form inside the vent, eventually leading to water leakage.
2. Improperly Installed Venting:
The second possible cause for water leaking from the dryer could be an improperly installed vent system. Yes, improper venting installed during the initial setup may result in air and moisture escaping into the surrounding area. As a result, it is causing water leakage.
3. Malfunctioning Water Supply:
Some dryers are equipped with steam functions or water supply lines for fabric steaming. If these components malfunction or become damaged, water may leak from the dryer.
4. Overloaded Dryer:
Overloading the dryer with laundry is another reason for water leaking. Because it prevents proper airflow, trapping moisture within the drum. Therefore, the excess moisture eventually leaves the appliance, leading to leaks.
5. Damaged or Worn Out Seals:
Damaged seals are like a hole in a water balloon – they let everything out! Water can leak through if the seals around the dryer drum are damaged.
6. Damaged or Loose Hoses:
The hoses connected to the dryer might be damaged or loose. This might cause the water to leak.
7. Faulty Connections:
Next on our list: faulty connections. Your dryer probably has faulty connections. If your dryer’s hoses are not hooked up, they can be unreliable!
8. Steam Dryers:
If your dryer has a steam feature, the water supply hose may leak or be incorrectly connected.
9. Drainage Issue:
If your washer and dryer are stacked or placed side by side, water could leak from the washer and only appear to be leaking from the dryer.
10. Malfunctioning Internal Parts:
In some cases, water leakage from the dryer may be caused by malfunctioning internal components. These can include faulty seals, gaskets, or hoses. If any of these parts are damaged or deteriorated, they can allow water to escape during the drying process.
11. Excessive Humidity in the Laundry Room:
Lastly, the high humidity levels in the laundry room can also contribute to water leakage from the dryer. If the moisture content in the room is too high, it hinders effective dryer moisture expulsion. Consequently, the excess moisture may then accumulate and result in leaks.
Adequate ventilation in the laundry area is crucial to maintain the ideal humidity level.
The Impact of Water Leaking on the Dryer’s Performance
Water leaking from a dryer can significantly affect its performance. Here’s how:
- Decreased Efficiency: When there’s a leak, the dryer takes longer to dry the clothes, which consumes more energy.
- Increased Wear and Tear: Water leakage can cause additional strain on the dryer components, leading to increased wear and tear.
Signs of Water Leakage from Dryers
- Puddles or dampness around the dryer.
- Unusual sounds, such as sloshing, coming from the dryer.
- Clothes remain wet after a complete drying cycle.
- Moldy or musty smell in or around the dryer.
- Condensation on nearby walls, windows, or doors.
- Rust or water stains on the back or bottom of the dryer.
- Water accumulation inside the dryer drum.
- Decreased efficiency in drying times.
- A noticeable increase in humidity in the laundry room.
- Dripping sound coming from the dryer during or after a cycle.
How to Fix the Problem of Water Leaks in Dryers
You already know the water leaking reason and sign. Meanwhile, it is time to learn how to fix the issue. Let’s explore with set by step guide.
Step 1: Identifying the Issue
First thing first, let’s play detective. Is your dryer really leaking water, or is there another culprit at play?
- Visual Inspection: Stay calm. Start with a simple visual inspection. Is there visible water on the ground? Is the dryer making unusual noises? Trust your senses! If Sherlock Holmes was in this case, he’d use his magnifying glass; but your eyes will work fine.
- Checking for Puddles: Did you find any puddles? Sometimes a little spill from the detergent can be mistaken for a leak. Make sure it’s not a case of mistaken identity!
Step 2: Examine the Water Supply
This step is not applicable if your dryer doesn’t use a water supply (for steam or other features) and is only a traditional vented dryer.
- Please turn off the dryer and unplug it from the electrical outlet.
- Locate the water supply hoses at the back of the dryer. These are usually two hoses, one for hot water and one for cold.
- Check for visible signs of leakage around the connection points of the hoses.
- Feel the hoses for dampness or moisture, which may indicate a slow leak.
- Tighten the connections if they seem loose. Use adjustable pliers to ensure they are secure but be careful not to overtighten.
- Inspect the hoses for signs of wear, cracking, or bulging, which could indicate a need for replacement.
- If necessary, replace the hoses with new ones. When doing this, ensure you also replace the rubber washers inside the hose connectors.
- Turn on the water supply to check if the leakage is fixed.
- Plug the dryer back in and monitor it during the next few cycles to ensure no leaks.
- Consider replacing steel-braided hoses, as they tend to be more durable than rubber or plastic hoses.
Step 3: Verify Proper Vent Installation
After examining the water supply and visual inspection, you must figure out whether the vest is properly installed. It is a curial step because it determines your next step.
- You must unplug the dryer from the electrical outlet before starting the inspection.
- Check if the vent hose is securely attached to the dryer and the external vent.
- Make sure the vent hose is not kinked or excessively bent, as this can trap moisture and cause leaks.
- Verify that the vent hose is made of a rigid or semi-rigid material, not a flexible foil type, as the latter is more prone to trapping lint and moisture.
- Ensure the vent hose is no longer than necessary; shorter hoses allow for more efficient airflow.
- Examine the external vent to confirm it has a flap that opens when the dryer is running and closes when it’s off. This prevents cold air and moisture from entering the vent.
- Check if the external vent is clear of obstructions like plants, debris, or lint build-up.
- Make sure the dryer is level. If not, adjust its feet according to the manufacturer’s instructions. An unlevel dryer can cause improper airflow and water accumulation.
- Reattach and secure any loose sections of the vent hose.
- Now plug the dryer back in and run a drying cycle while observing the external vent to ensure the flap is opening properly.
- Monitor the dryer for any signs of water leakage during subsequent uses.
Step 4: Manage Humidity Levels in the Laundry Room
To minimize humidity-related issues, consider implementing the following measures:
- Ensure proper ventilation in the laundry room. Install exhaust fans or open windows to improve airflow and reduce moisture buildup.
- Use a dehumidifier to control humidity levels effectively.
- Avoid hanging wet clothes in the laundry room. Instead, move them to a well-ventilated area or utilize a clothesline outside.
Step 5: Inspect and Clean Ventilation System
When the water supply is ok, and the vent has been installed correctly. Next, examine the ventilation system for any blockages or damage. Now follow the following step to clean it thoroughly.
- Unplug the dryer from the electrical outlet.
- Move the dryer away from the wall for easy access.
- Use a screwdriver to loosen the clamp and detach the vent hose.
- Vacuum the vent hose and the opening on the dryer to remove lint and debris.
- Use a vent cleaning brush to scrub the inside of the vent hose.
- Clean the exterior vent opening by removing its cover and cleaning out debris.
- Reattach the vent hose to the dryer and secure it with the clamp.
- Check the dryer’s lint trap and clean it as well.
- Move the dryer back into place, ensuring the vent hose is not kinked or bent.
- Plug the dryer back in and run it on the air-only setting for a few minutes to blow out any remaining debris.
- Monitor the dryer closely during the first few cycles to ensure no water leaks or other issues.
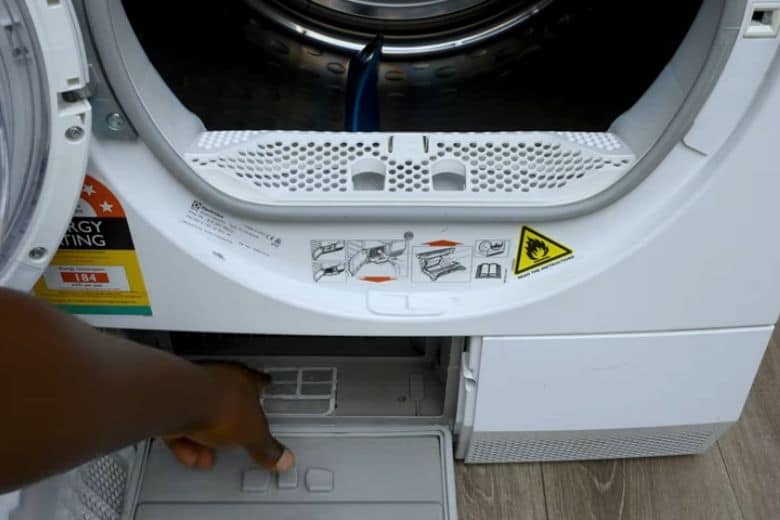
Step 6: Clean or Replace the Lint Filter
If the problem is with the filter, you can try the mentioned method to prevent water leakage.
- Unplug the dryer for safety before starting any maintenance.
- Locate the lint filter, usually found on the top of the dryer or inside the dryer’s door.
- Pull out the lint filter gently.
- Use your hands or a small brush to remove the lint from the filter.
- If the lint filter is very dirty, rinse it under warm water using a soft brush to remove additional lint or debris.
- Ensure the lint filter is completely dry before reinserting it into the dryer.
- Slide the lint filter back into its slot and ensure it is securely in place.
- If the lint filter is damaged or excessively worn, consider replacing it with a new one that is compatible with your dryer model.
- After cleaning or replacing the lint filter, plug the dryer back in.
- Make it a habit to clean the lint filter after every drying cycle to prevent future issues.
Step 7: Replace Damaged Seals
If you notice worn-out or damaged seals, promptly replace them. Here is the technique:
- Open the dryer door and inspect the door seal for visible signs of wear, damage, or looseness.
- If the seal is damaged, use a screwdriver or a similar tool to gently pry the old seal off.
- Once the old seal is removed, clean the area where the seal was attached to remove residue or debris. You can use a mild detergent and a cloth for this.
- Measure the length of the seal you need. Accordingly, purchase a replacement door seal that is compatible with your dryer model.
- Before installing the new seal, check if it requires adhesive. Some seals are adhesive-backed, while others need a special glue.
- If adhesive is needed, apply it to the channel where the seal will be placed. Make sure to apply it evenly.
- Carefully place the new seal in the channel. Starting at one end and working your way around the door. Press firmly to ensure it adheres properly.
- If the seal has any corners, make sure they are properly aligned and secured.
- Leave the door open for a few hours if you used glue, to allow it to dry properly.
- Once the adhesive is dry, close the door to check if the seal is properly installed and the door closes tightly.
- Plug the dryer back in and run a drying cycle to ensure no leaks around the door.
- If your dryer also has drum seals (usually found around the front and back of the drum). Inspect them as well for any signs of wear or damage and replace them following a similar procedure.
Note: Replacing seals can be a delicate task. If you’re unaware of doing it yourself or encounter any issues, it’s advisable to contact a professional appliance repair technician.
Step 8: Manage Load Capacity
Managing load capacity properly helps prevent water leakage. Here is the technique how for managing load capacity for your dryer:
- Check the manufacturer’s manual for the recommended load capacity.
- Avoid overloading or underloading the dryer.
- Distribute clothes evenly in the drum.
- Separate heavy and light items into different loads.
- Ensure large items have space to tumble freely.
- Use appropriate drying cycles for different fabrics.
- Check clothes for dryness during the cycle.
- Use sensor drying option if available.
Step 9: Inspect and replace faulty parts
These steps are quite tricky, so alter and do it carefully. Have a look at the process:
- Start by unplugging the dryer from the electrical outlet.
- Begin the inspection by checking common areas. Like the door seal, water supply hoses, and ventilation for visible damage or wear.
- If your dryer uses water (e.g., for steam functions), check the water inlet valve for leaks or signs of malfunction.
- Inspect the drum seals and bearings. They might need to be replaced if worn out to prevent water from escaping.
- Check the heating element. If it’s not working properly, it might not evaporate the water efficiently, leading to leaks.
- Examine the internal hoses and connections that lead to the water pump (in washer/dryer combos or dryers with steam functions). Replace them if they’re leaking or show signs of wear.
- If you find a faulty part, look for its replacement based on the dryer’s model number. Make sure the replacement part is compatible with your dryer.
- After obtaining the replacement part, carefully remove the faulty part according to the manufacturer’s instructions or repair manual.
- Install the new part securely. If you’re unsure how to do this, consult the manufacturer’s manual or seek
- Once you’ve replaced the necessary parts, plug the dryer back in.
- Run a drying cycle to check if the leaking issue has been resolved.
- Monitor the dryer over the next few cycles to ensure no further leaks or issues.
Note: Please note that working with electrical appliances can be dangerous. Especially if you need to become more familiar with their components. If you need more confidence in your ability to safely inspect and replace parts. It’s advisable to contact a professional appliance repair technician.
Step 10: Seek Professional Help if Needed
If you’ve tried, all the troubleshooting steps and the water leak is still there. Moreover, if you need more time to do any fixes yourself. Therefore, it’s a good idea to get help from a professional. A skilled technician can figure out the problem and fix it or replace any needed parts.
The Role of Advanced Dryers in Preventing Water Leaks
Investing in an advanced dryer with smart technology can be a game-changer.
- Sensors and Alarms: Some advanced dryers come with sensors and alarms that notify you of a leak, so you can take immediate action.
- Enhanced Lint Filters: Advanced lint filters are more efficient in trapping lint, which reduces the chances of clogs and subsequent leaks.
- Smart Maintenance Reminders: Smart dryers can also remind you when it’s time for maintenance, which helps prevent leaks.
Frequently Asked Questions
Is a leaking dryer dangerous?
Answer: While not immediately dangerous, prolonged leakage can lead to mold, electrical issues, and other complications.
How often should I clean my dryer to prevent water leaks?
Answer: To prevent water leaks, cleaning your dryer regularly is essential. Clean the lint trap before or after each load, remove lint buildup inside the dryer, and schedule periodic maintenance checks as the manufacturer recommends.
How do I test my dryer moisture sensor?
Answer: To test your dryer’s moisture sensor, first unplug the dryer. Locate the sensor inside the drum and clean it with a soft cloth. Plug the dryer back in and run a timed dry cycle with damp towels. The sensor is working if the dryer stops when the towels are dry. If it keeps running, the sensor might be faulty.
Conclusion
So, there you have it – the insider’s guide to tackling the mystery of a water-leaking dryer. From detective work to DIY, we’ve covered it all. Always remember: stay calm, think clearly, and don’t be afraid to call in the cavalry!
Although water leaking from dryer can be a cause for concern, but with the right knowledge and troubleshooting steps, you can address and prevent this issue.
Best of luck!
Paul Newman is a blogger who writes about plumbing and home improvement. Over the past 20 years, I have worked as a plumber. My passion is to share my knowledge and experience with others to improve their homes.