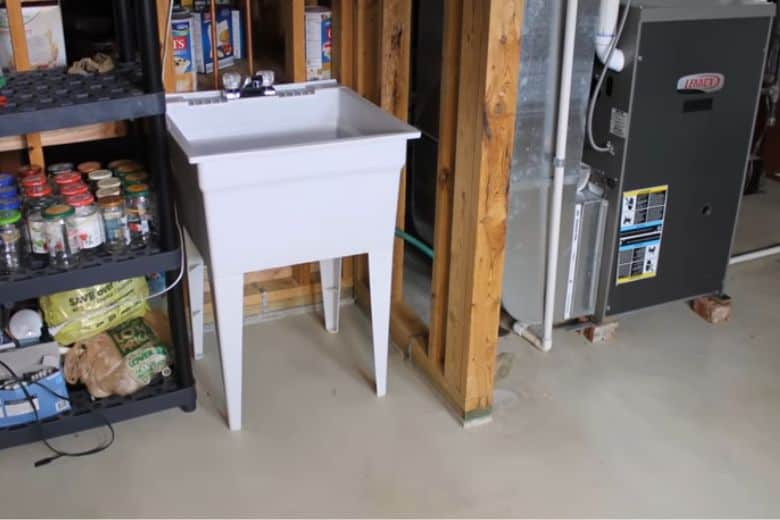
In numerous households, a utility sink is commonly used to link with the washing machine for drainage purposes. If the washing machine and laundry are located in the basement. In that case, it becomes necessary to drain the utility sink to the floor drain afterward.
Eventually, to connect a utility sink to a floor drain, it is mandatory to understand the process. It involves measuring the distance between the sink and floor drain, connecting them with a drain hose, and ensuring a secure connection.
So, without further talk, let’s start and discover how to hook up a utility sink to a floor drain.
How to Hook Up a Utility Sink to a Floor Drain
When installing a utility sink for the laundry area, it is necessary to drain the sink. Typically, people prefer draining the utility sink to the basement floor drain for ease. However, when connecting the utility sink to the floor drain, it is essential to consider the following two points.
- Firstly, it is only possible to connect the utility sink to the floor drain if it leads directly to the main sewer line of your home.
- Secondly, if the floor drain requires a sump pit to gather and pump water directly to the sewer line, connecting the utility sink to the drain is not advisable.
Therefore, it is necessary to carefully examine the floor drain configuration before moving on to the subsequent steps.
The Following Items are Required for This Purpose:
- Tape measure
- Connecting hose
- Permanent marker
- Reciprocating saw
- Utility knife
- Primer and solvent glue
- 90-degree elbow
- 2-inch standpipe with trap
- Pipe strap
After gathering all the necessary items, you can connect the utility sink to the floor drain.
Step 1: Take Measurements
To begin, take accurate measurements using a measuring tape to determine the distance between the floor drain and the utility sink where the washing machine is located. This distance will help you determine the required length of the water hose or drain pipe to connect the floor drain to the sink.
Step 2: Cut the Hose to the Appropriate Length
After determining the necessary length of the drain hose, proceed to cut the hose accordingly. You can easily accomplish this by utilizing a reciprocating saw. Secure the hose on an even surface and cut it with the reciprocating saw to achieve the desired length.
Start cutting the drain hose a few inches longer than the distance between the utility sink and the floor drain. For example, if the space is 5ft, we suggest trimming the drain hose to 5ft and 6 inches long. The additional length of the drain hose will facilitate its proper usage. Moreover, the extra length will enable you to establish the drainpipe more efficiently and quickly.
Step 3: Attach the Drain Pipe to the Sink
Next, you must attach the drainpipe to the utility sink. To do so, access the area beneath the sink. As you’ll need to sit on the basement floor, placing an old cloth on the floor is recommended to keep it clean. Proceed to connect the drain hose with the tailpiece of the sink.
The tailpiece is situated directly beneath the utility sink and is typically an ABS pipe. You may cut a hole in the tailpiece and thread the drain hose through it to collect the water or connect it directly to the strainer pipe to drain the water.
Step 4: Fasten the Drain Pipe
When you connect the drain hose to the utility sink, use Teflon tape or putty to secure it. Make sure that there are no leaks around the connection point. You can attach the 90-degree elbow to the tailpiece under the sink strainer and secure the connection with Teflon tape.
The 90-degree elbow can serve as a point of securement. Additionally, you can install another P-trap and pass the drain hose through it.
Step 5: Connect the Drain Hose to the Floor Drain
To complete the installation, extend the drain hose to the floor drain in your basement. Cut a hole through the floor drain cover, which is typically made of metal or plastic. You can use a reciprocating saw to widen the gap in the drain cover easily.
Once you have cut a hole in your basement’s floor drain cover, insert the utility sink’s drain hose through it. Secure the connection with Teflon tape or putty and ensure that it is fully sealed to prevent leaks. It will ensure that water does not seep through the drain hose and cause any water damage.
Following these steps, you can successfully connect the utility sink to the floor drain. As a result, the water from the sink will flow into the floor drain and then into the sewer line. This process ensures that your washing machine empties correctly.
Tips for Installing a Basement Floor Drain in The Laundry Space
More than installing and connecting the utility sink in the laundry room is required. It is also crucial to properly install the floor drain. To ensure that you install and use the basement floor drain correctly, follow the tips provided below.
- You should install water-resistant baseboards in the laundry room. Because it will protect the surrounding walls from any water damage or leakage. These baseboards will help prevent further damage in case of significant water spills.
- To ensure a secure connection, apply a thin layer of ABS or PVC glue around the pipe’s surrounding area. Be careful not to use too much glue, which may drip and cause a mess. It will help you secure the connection point without excessive glue.
- Before mounting the actual floor drain, it is advisable to practice with a smaller ABS pipe. Begin by getting a 2-inch long ABS coupling and attempting to fix it correctly a few times. Practice fitting the ABS coupling in a small piece of an already-used ABS pipe until you feel confident enough to install the actual ABS pipe. This practice will help you accomplish the primary task more efficiently and precisely.
- Remember that the ABS coupling may loosen when you apply glue to it. You should press the coupling firmly for several minutes until it fits securely into the ABS pipe and does not come off.
Once you follow these tips, installing the floor drain will become a breeze. After that, connecting the utility sink to it will be an easy task.
Frequently Asked Questions:
Can I drain the utility sink into the floor drain?
Answer: You should refer to your area’s building codes and plumbing regulations to confirm if it’s permissible to drain the utility sink to the basement floor drain. But, if the floor drain is linked to the sump pit instead of the primary sewer line, you must avoid draining the utility sink into the floor drain.
Where does water from the floor drain go?
Answer: The water from a floor drain typically goes directly into the sewer system or a septic tank, depending on the plumbing setup of the building. It is important to ensure that the floor drain is installed correctly and connected to the appropriate drainage system to prevent any water damage or sanitation issues.
Does the utility sink need a vent?
Answer: Yes, a utility sink typically needs a vent to prevent airlock and allow proper drainage. The vent allows air to enter the plumbing system and balance the pressure, which helps in smooth water flow and efficient draining. Without a vent, the sink may drain slowly, and foul odors may emanate.
What is the difference between a floor drain and a floor trap?
Answer: A floor drain is a plumbing fixture installed on the floor to remove water from the floor surface and drain it away. On the other hand, a floor trap is installed in the floor drain to prevent sewer gases from entering the room. While a floor drains drains water away, a floor trap ensures the room remains odor-free.
Can I use a vent pipe as a drain?
Answer: In practice, using a vent pipe as a drainpipe is not advisable, even though it is technically possible. The vent pipe is usually bigger than drain pipes and may not fit well in the plumbing system.
Conclusion
This guide on how to hook up a utility sink to a floor drain can help keep your laundry room and washing machine in good condition. Connecting the drainpipe to the utility sink and floor drain is simple. It can be completed as a DIY plumbing project in just a few minutes. Installing the floor drain can also provide satisfaction and peace of mind.
Paul Newman is a blogger who writes about plumbing and home improvement. Over the past 20 years, I have worked as a plumber. My passion is to share my knowledge and experience with others to improve their homes.