Are you planning to upgrade your kitchen? Do you want to install double kitchen sink plumbing with dishwasher? If yes, then you have come to the right place.
Because today we will provide a comprehensive walkthrough on installing double kitchen sink plumbing with a dishwasher.
However, a double sink and dishwasher setup is a standard and highly efficient configuration. With detailed instructions and helpful tips, you can confidently tackle this project and achieve a high-quality result.
Without further words, let’s walk through the step-by-step process of installing double kitchen sink plumbing with a dishwasher process.
Why Choose a Double Kitchen Sink?
Double kitchen sinks are like Batman and Robin – they’re better together. Having two basins is a game-changer. It means more space for cleaning dishes, prepping food, and multitasking. Moreover, they often come in sleek designs that add sophistication to your kitchen. So why settle for one when you can have two?
But the question is, is double sink plumbing challenging?
Well, you must remember double kitchen sink plumbing involves a complex configuration compared to a single sink. As it requires connecting two sink basins, along with a dishwasher, to the primary drainage system. Consequently, proper installation is mandatory. Because it will ensure the sinks and dishwasher work efficiently without any leaks or clogs.
However, there are many things you must know, learn and consider before you install.
Have a look one by one.
Understanding the Anatomy of Your Kitchen Plumbing
Before we get into the installation process, it would be helpful to understand the components involved.
Sink Components
- Faucet: Your gateway to water, available in various styles and functionalities.
- Basin: The bowl that holds the water. In a double kitchen sink, you have the luxury of two basins.
- Strainer: Prevents debris from clogging the drain.
- Pipes and Fittings: The gateway to water, available in various styles and functionalities.
Dishwasher Components
- Inlet Valve: The dishwasher’s heart controls the water supply.
- Hoses: These serve as the arteries, transporting water to and from the dishwasher.
- Drain Line: This ensures that waste water is efficiently whisked away.
How to Prepare for the Installation Process
After acknowledging the part of both the sink and dishwasher, it’s time to plan the layout for the project. Consider the following factors:
- Available Space: Measure the area where you intend to install the double sink and dishwasher to ensure it fits properly.
- Plumbing Access: Assess the existing plumbing system to determine the best location for the new sink and dishwasher. Take note of the water supply and drain lines.
- Countertop Compatibility: Check if your countertop can accommodate the double sink and dishwasher, considering both size and weight requirements.
- Cabinet Strength: Ensure that the cabinet beneath the sink can support the weight of the double sink and dishwasher.
Understanding Plumbing Basics
The double kitchen sink typically has two drains, one for each basin. These drains will merge into a single pipe that connects to the home’s main drain line. It is the fundamental plumbing components you must understand for installing.
- The Role of the P-trap: A P-trap is critical in double kitchen sink plumbing. This u-shaped pipe section is designed to trap a small amount of water that acts as a seal to prevent sewer gases from entering the kitchen.
- Configuration: When adding a dishwasher to the double sink plumbing, a high loop is crucial when adding a dishwasher to the double sink plumbing. This entails running the dishwasher drain hose as high as possible under the countertop before connecting it to the kitchen sink’s drain pipe. It prevents water from siphoning back into the dishwasher.
- Connection Points: The dishwasher is typically connected via two main points: the water supply and the drain. The water supply line is connected to the hot water, while the drain line connects to the garbage disposal or the sink’s drain via an air gap or high loop.
How to Install Double Kitchen Sink Plumbing with Dishwasher
You wouldn’t see a knight go into battle without his sword, right? Your armor is the list of tools you need for the project.
Required Tools and Materials
- Adjustable wrench
- Pipe wrench
- Screwdriver
- Hacksaw
- Tape measure
- Plumber’s putty
- Plumbers tape
- PVC pipes and fittings
- Sink clips
- Dishwasher installation kit
Now that we’ve covered the essential aspects of double kitchen sink plumbing with a dishwasher, let’s move on to the step-by-step installation process.
Step 1: Turning Off the Water Supply
Before starting plumbing work, turn off the water supply to avoid leaks or accidents. Locate the main water shut-off valve. It is usually found near the water meter or where the main water line enters your home. Turn the valve clockwise to shut off the water supply.
Step 2: Clearing the Workspace
Creating a safe and organized work environment is crucial for a successful installation. Clear out any items from under the sink and around the installation area. It will provide you with ample space to man oeuvre and work efficiently.
With the tools gathered, the water supply was turned off, and the workspace cleared. You’re now ready to proceed with removing the existing sink and plumbing.
Step 3: Removing the Existing Sink and Plumbing
You’ll first need to remove the existing sink and plumbing components to install a new double kitchen sink and dishwasher.
Disconnecting the Water Supply Lines:
Start by disconnecting the water supply lines from the existing sink. Use an adjustable wrench to loosen the compression nuts. It is securing the supply lines to the faucet’s tailpieces. Once loosened, carefully unscrew the nuts by hand and remove the supply lines.
Removing the Drain Pipes:
Next, remove the drain pipes connected to the existing sink. Using a pipe wrench, loosen the nuts connecting the drain pipes to the sink’s tailpiece and the main drain line. After loosening, gently pull the drain pipes away from the sink and the main drain line.
Taking Out the Old Sink:
Once the supply lines and drain pipes are disconnected, you can remove the old sink. Depending on the sink installation method, you may need to unscrew clips or brackets. Those are the component generally securing the sink to the countertop. With the sink free, carefully lift it out and set it aside.
You can install the new double kitchen sink and dishwasher with the old sink and plumbing removed.
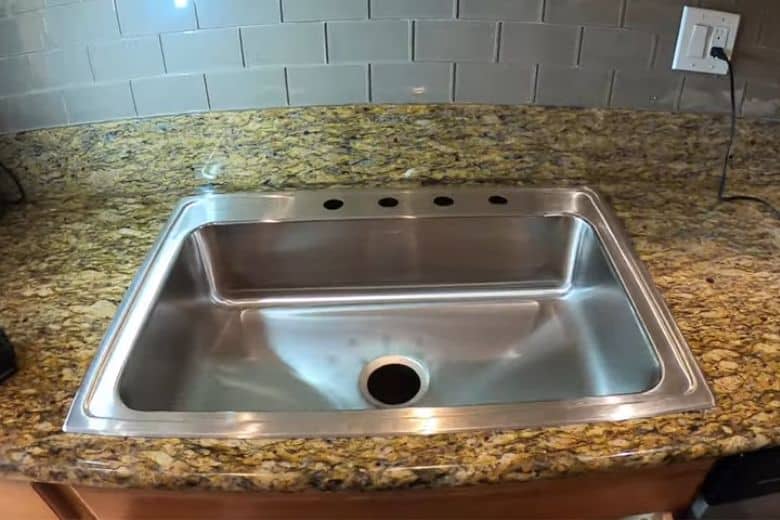
Step 3: Installing the New Sink
Installing the new sink involves:
- Measuring.
- Mark the sink position.
- Cut the countertop (if necessary).
- Secure the sink.
Measuring and Marking the Sink Position
Begin by measuring the dimensions of the new sink. Using a tape measure, carefully measure the sink’s length, width, and depth. Mark these dimensions on the countertop, ensuring accurate placement of the new sink.
Cutting the Countertop
Suppose your new sink has different dimensions than the previous one. In that case, you may need to cut the countertop to accommodate the larger size. Before making any cuts, double-check the measurements. Use a pencil or marker to outline the area to be removed.
Remember the old saying, “Measure twice, cut once!” It will ensure precision and accuracy in your cuts.
Placing the sink and securing it
With the countertop prepared, carefully lower the new sink into the designated area. Ensure the sink aligns with the markings and sits flush with the countertop surface. Once in place, secure the sink by tightening the clips or brackets. It is provided with the sink installation kit. Use a screwdriver to tighten the clips, ensuring a snug fit.
Congratulations! You’ve successfully installed the new sink. Now it’s time to move on to setting up the dishwasher.
Step 4: Setting Up the Dishwasher
Positioning the dishwasher correctly, connecting the water supply line, and attaching the drain line are essential steps in setting up the dishwasher.
Positioning the dishwasher
Before connecting plumbing lines:
- Position the dishwasher near the sink.
- Therefore, ensure it aligns with the designated space.
- Leave enough room for easy access to the dishwasher controls and to connect the necessary lines.
Connecting the water supply line
You’ll need to locate the hot water supply valve under the sink to connect the dishwasher to the water supply. Connect one end of the dishwasher water supply line to the hot water supply valve. It will ensure a secure connection. Use an adjustable wrench to tighten the connection. Be aware to avoid overtightening to prevent damage to the valve or the line.
Attaching the drain line
The dishwasher drain line connects to the sink’s drain system. Start by locating the dishwasher drain outlet. It is typically located at the back of the dishwasher. Attach one end of the drain line to the dishwasher drain outlet. Now secure it with a hose clamp.
Next, connect the other end of the drain line to the sink’s drain system. It can be done by removing the drain plug from the garbage disposal unit. On the other hand, you can connect the drain line to the air gap (if present). Ensure a secure connection and use a hose clamp to hold the drain line in place.
With the dishwasher set up, it’s time to move on to installing the drainage system for the double kitchen sink.
Step 5: Installing the Drainage System
Installing the drainage system involves:
- Choose the appropriate drainage configuration.
- Connect the drain pipes.
- Ensure proper sealing and alignment.
Choosing the appropriate drainage configuration
There are different drainage configurations you can choose from. It is mainly depending on your kitchen layout and local plumbing codes. The most common options include the “double trap with a single drain” and the “individual trap and drain” configurations.
The “double trap with a single drain” configuration involves using one trap to serve both sinks, with a single drain line connecting to the main drain. On the other hand, the “individual trap and drain” configuration uses separate traps and drain lines for each sink.
Consult your local plumbing codes and consider the layout of your kitchen. It will help you decide on the drainage configuration best suits your needs.
Connecting the drain pipes
Attach the tailpieces to the sink’s drain openings to connect the drain pipes. Insert the tailpieces and secure them using slip nuts and washers. Ensure a tight connection but be cautious not to overtighten because it will risk damaging the sink or pipes.
Next, connect the P-trap to the tailpiece(s) using slip nuts. The P-trap prevents odors from entering the kitchen by creating a water barrier. Make sure the P-trap is aligned correctly and securely fastened.
Ensuring proper sealing and alignment
Proper sealing is crucial to prevent leaks and ensure efficient water flow. Apply the plumber’s putty or silicone caulk to the areas where the sink and drain connections meet. It will create a watertight seal and prevent any potential leaks.
Once the connections are sealed, check the alignment of all the pipes and ensure they are straight and properly aligned. Adjust as necessary, ensuring no kinks or bends may hinder the flow of water.
Step 6: Connecting the Water Supply Lines
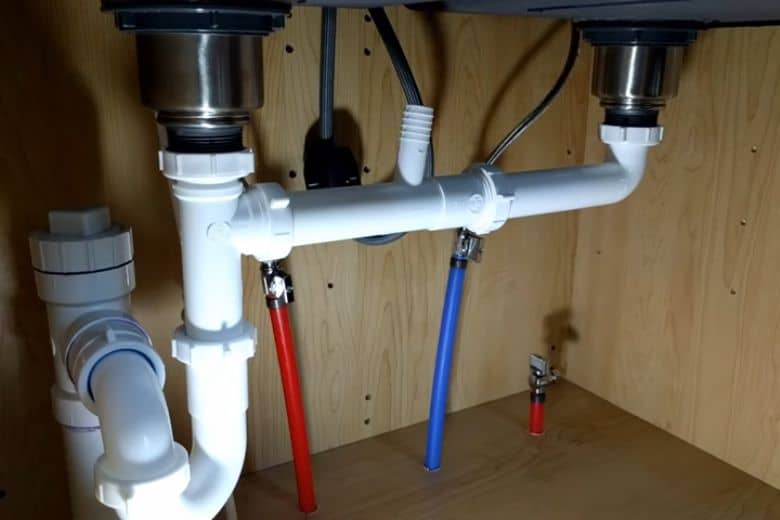
Connecting the water supply lines involves:
- Install shut-off valves.
- Attach the supply lines to the sink and dishwasher.
- Check for leaks.
Installing shut-off valves
Installing shut-off valves provides a convenient way to control the water supply to the sink and dishwasher. Locate the hot and cold-water supply lines under the sink and install shut-off valves on each line. Ensure that the valves are securely attached and in the closed position.
Attaching the supply lines to the sink and dishwasher
Connect the supply lines to the respective hot and cold shut-off valves. Ensure a tight connection using an adjustable wrench to tighten the compression nuts. Once connected, double-check the alignment and ensure that the supply lines are not twisted or kinked.
Checking for leaks
Before turning on the water supply, inspect all the connections for potential leaks. Look for signs of water drips or moisture around the supply lines, shut-off valves, and drain connections. If any leaks are detected, tighten the connections or replace any faulty components as necessary.
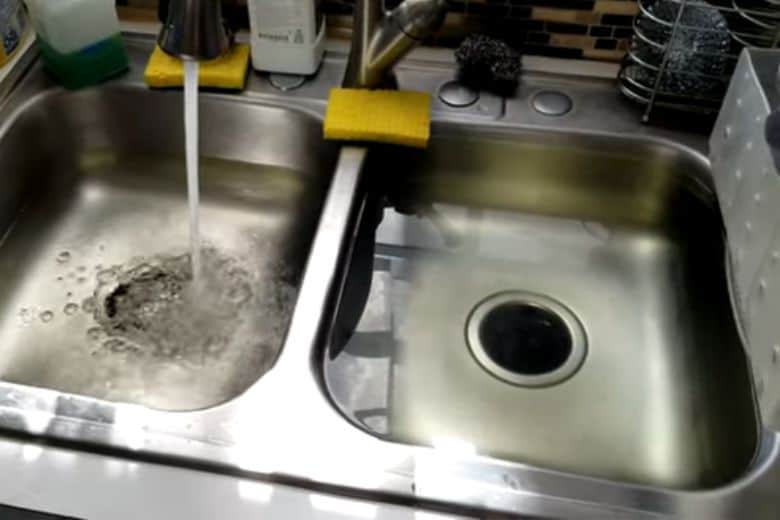
Step 7: Testing the Plumbing System
With the installation complete, it’s time to test the plumbing system to ensure proper operation and check for leaks.
Turning on the water supply
Gradually turn on the water supply by opening the shut-off valves. Monitor the connections closely as the water flows through the pipes. Check for any signs of leaks or drips.
Inspecting for leaks and proper drainage
Inspect all the connections, drain lines, and supply lines as the water flows for any leaks. Pay close attention to the areas where the pipes and fittings are joined. If any leaks are detected, tighten the connections or replace faulty components.
Additionally, observe the drainage system to ensure proper water flow. Fill both sinks with water and remove the drain plugs to allow the water to drain. Observe the flow and ensure there are no backups or slow drainage.
Ensuring the smooth operation of the dishwasher
Test the dishwasher for smooth operation once the water supply and drainage are functioning correctly. Run a test cycle to ensure the dishwasher fills, washes, and drains properly. Monitor for any unusual noises or malfunctions.
If everything is working as expected, congratulations! You have successfully installed double kitchen sink plumbing with a dishwasher.
Benefits of Double Kitchen Sink Plumbing with Dishwasher
- Increased Efficiency: A double sink and dishwasher setup enhances your working area. You can simultaneously clean dishes in one basin while using the other for food preparation or rinsing.
- Time-Saving: The double sink allows for multitasking. It save you time and effort when handling various kitchen activities.
- Separation of Tasks: You can designate one sink for washing dishes and the other for rinsing. It will enhance organization and reduce clutter.
- Convenient Dishwasher Connection: Double sink plumbing makes it easier to connect a dishwasher. It will simplify the process and optimise kitchen workflow.
Common Plumbing Issues and Solutions
While double kitchen sink plumbing with a dishwasher offers numerous benefits, it’s essential to be aware of potential plumbing issues that may arise. Here are some common problems and their solutions:
1. Clogs and Slow Draining
Over time debris and food particles can accumulate in the drains. It can lead to clogs or slow draining. To prevent this, regularly clean the sinks and use drain strainers to catch larger particles. If a clog occurs, you can clear it with a plunger or drain snake. For more stubborn clogs, professional plumbing assistance may be required.
2. Leaks and Dripping Faucets
Leaky pipes or dripping faucets are common issues in plumbing systems. Check for signs of leaks, such as water stains or mold growth, and promptly repair any damaged parts. Tightening loose connections or replacing faulty components can often resolve these problems.
Frequently Asked Questions
Do I need a permit to install double kitchen sink plumbing with a dishwasher?
Answer: Yes, in most cases, you’ll need a permit. Check with your local authorities.
How long does it take to install double kitchen sink plumbing with dishwasher?
Answer: It’s a day’s work for a seasoned DIY-er. New to the game? Give it a weekend.
Can I reuse my old sink and faucet for the double sink installation?
Answer: Reusing your old sink and faucet is possible if they are still in good condition and compatible with the new setup. However, using new fixtures can provide a fresh look and ensure better functionality.
Are there any safety precautions I should consider during the installation?
Answer: When working with plumbing, always shut off the water supply and ensure a safe and stable working environment. Use appropriate safety gear, gloves and goggles, and caution when handling tools and materials.
What’s the purpose of an air gap in dishwasher installation?
Answer: Generally, an air gap prevents backflow, keeping contaminated water at bay.
Conclusion
There you have it! Your ultimate guide on how to install double kitchen sink plumbing with dishwasher. So, roll up your sleeves and get down to business. With our expert tips, your kitchen will be the envy of the neighborhood. Don’t forget to pat yourself on the back when you’re done; you’ve earned it!
Paul Newman is a blogger who writes about plumbing and home improvement. Over the past 20 years, I have worked as a plumber. My passion is to share my knowledge and experience with others to improve their homes.